NOS- CTV12 Communicate and co-ordinate within a multi camera shoot
Performance Statements-
– P9 use appropriate signals or gestures when verbal communication is impracticable
NOS- CTV2 Set camera menus for portable single camera (PSC) operation
Performance Statements-
– P6 identify, select and correctly adjust the settings on the selected camera menu or sub-menu pages for the required output
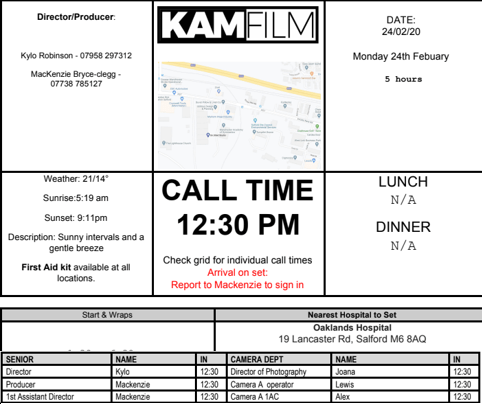
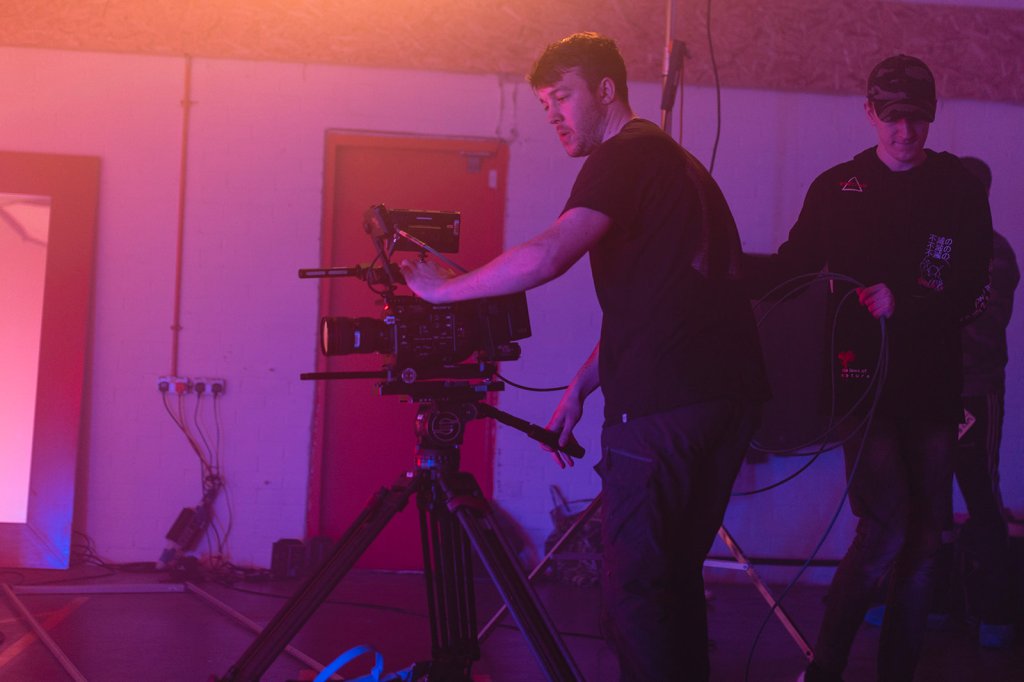
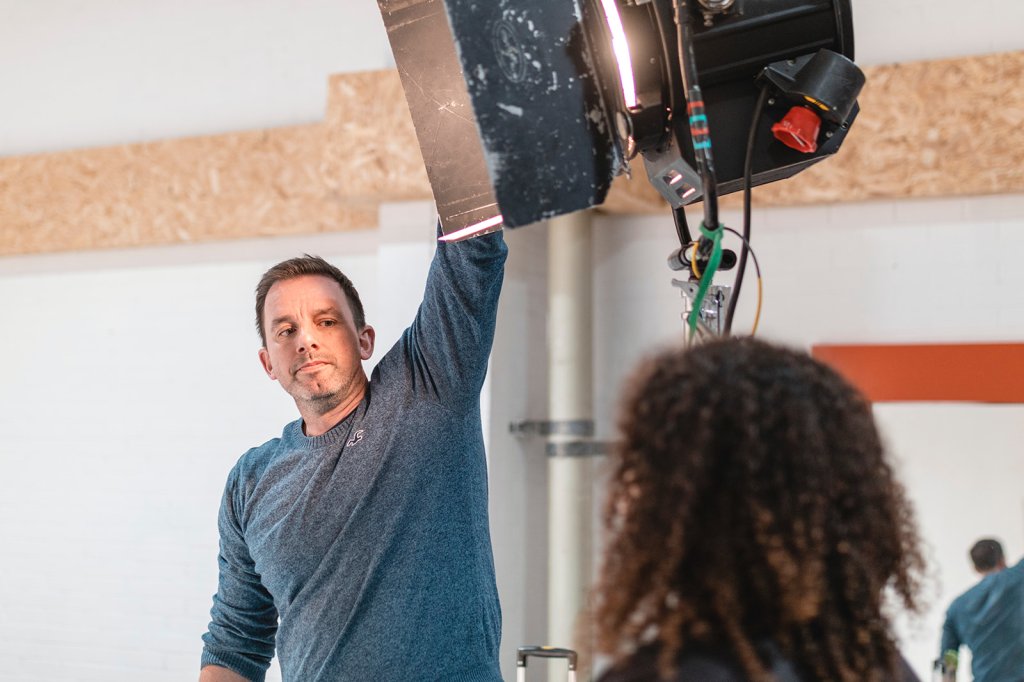
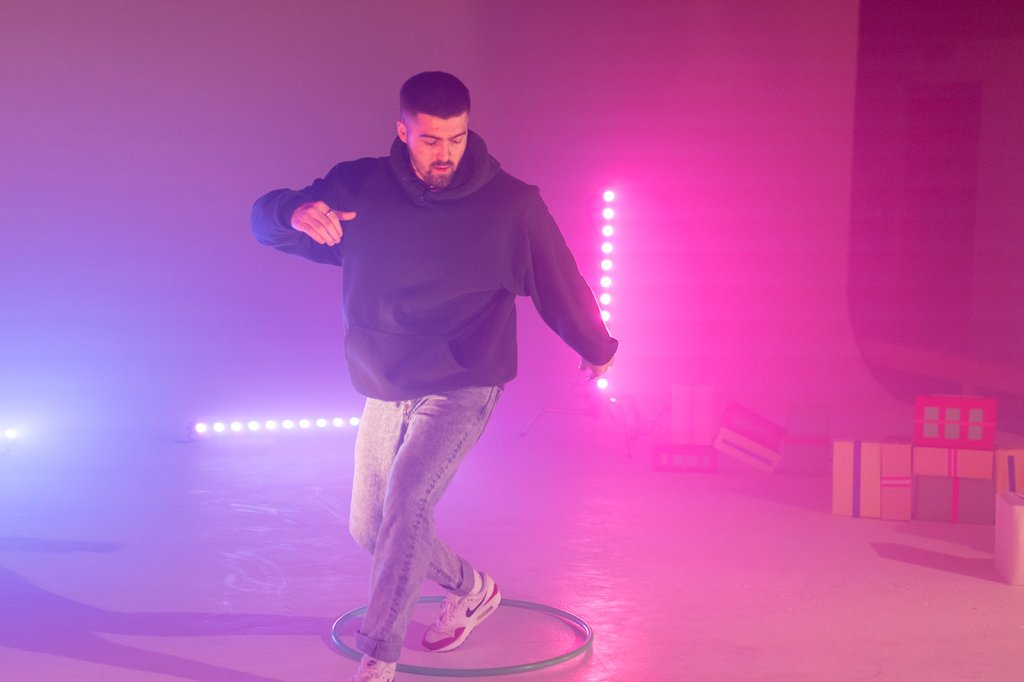
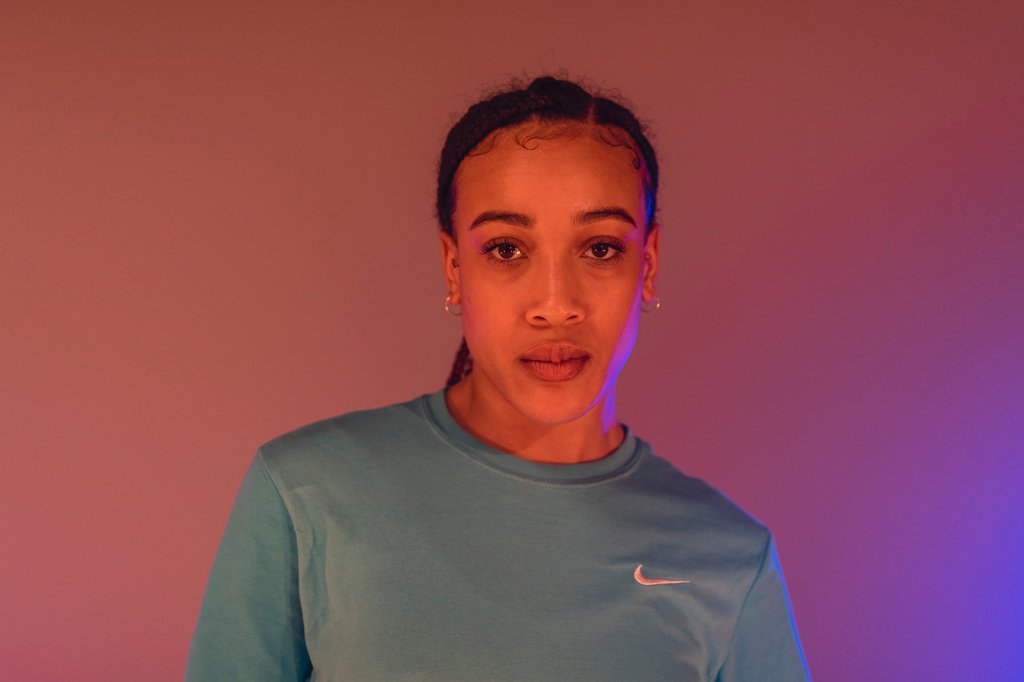
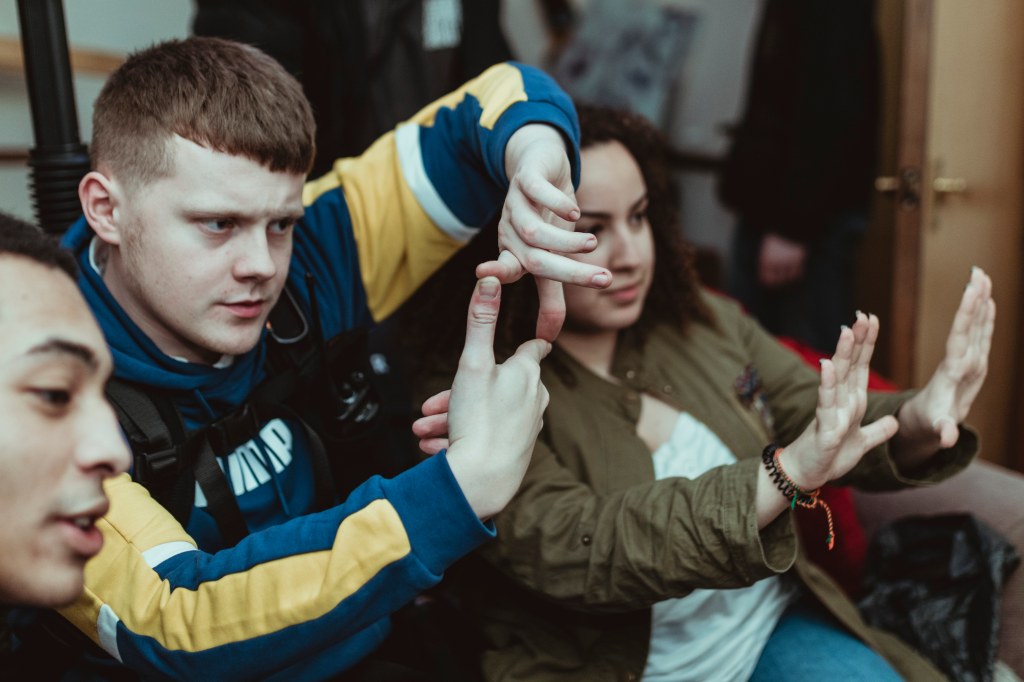
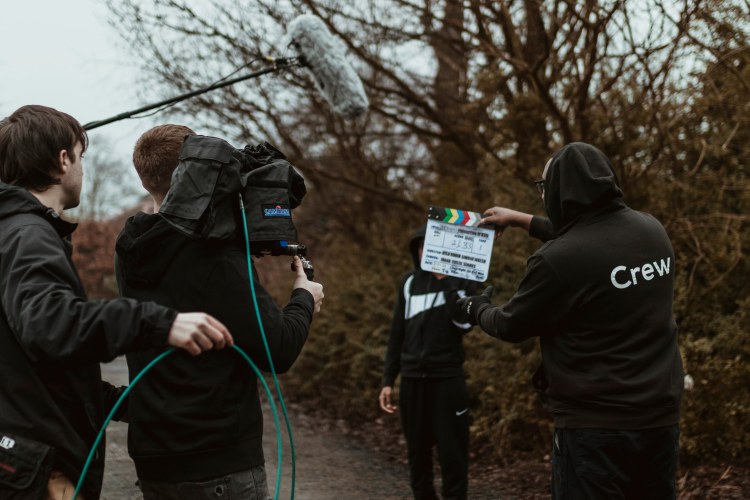
This JD Concept video, was shot for The ASH Company (ASH, 2020) a Manchester based dance company who I have worked for on many occasions via KAMFilm. The aim of this shoot was to capture some of their dancers, dancing with props which would later be given to the clothing/shoe company JD Sports (JD, 2020) as an idea they could use for one of their clothing range adverts. The idea being, dancers of different ages wearing their merchandise whilst dancing with the props.
Lens Flare TV…
Official LensFlareTv Logo
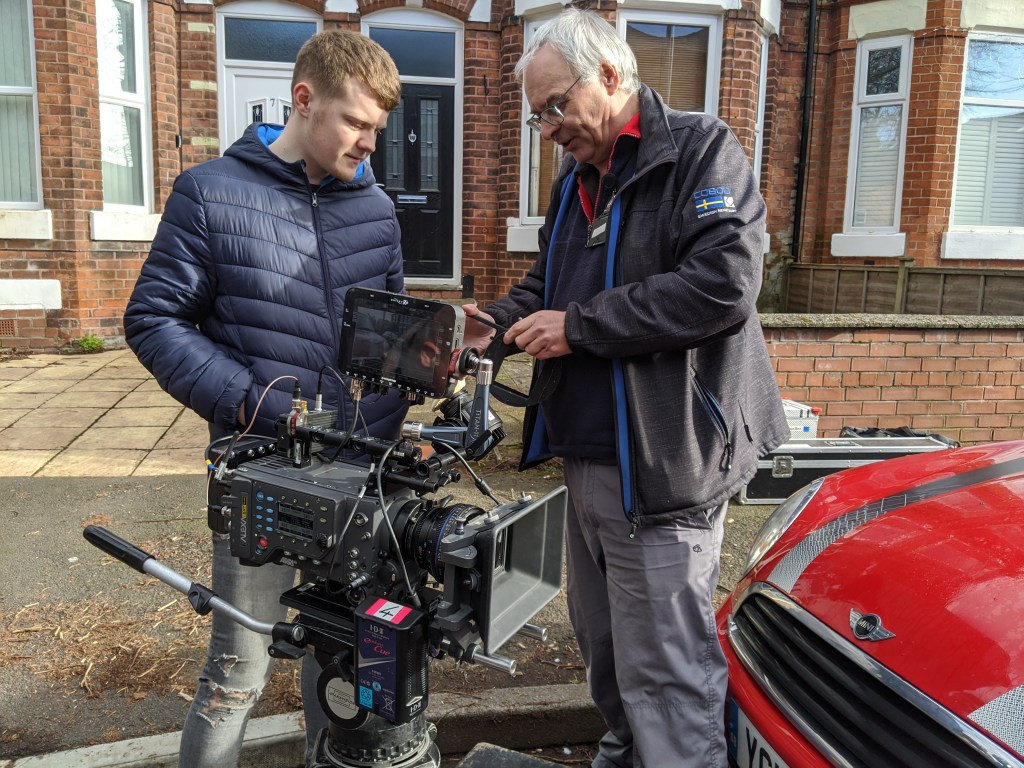
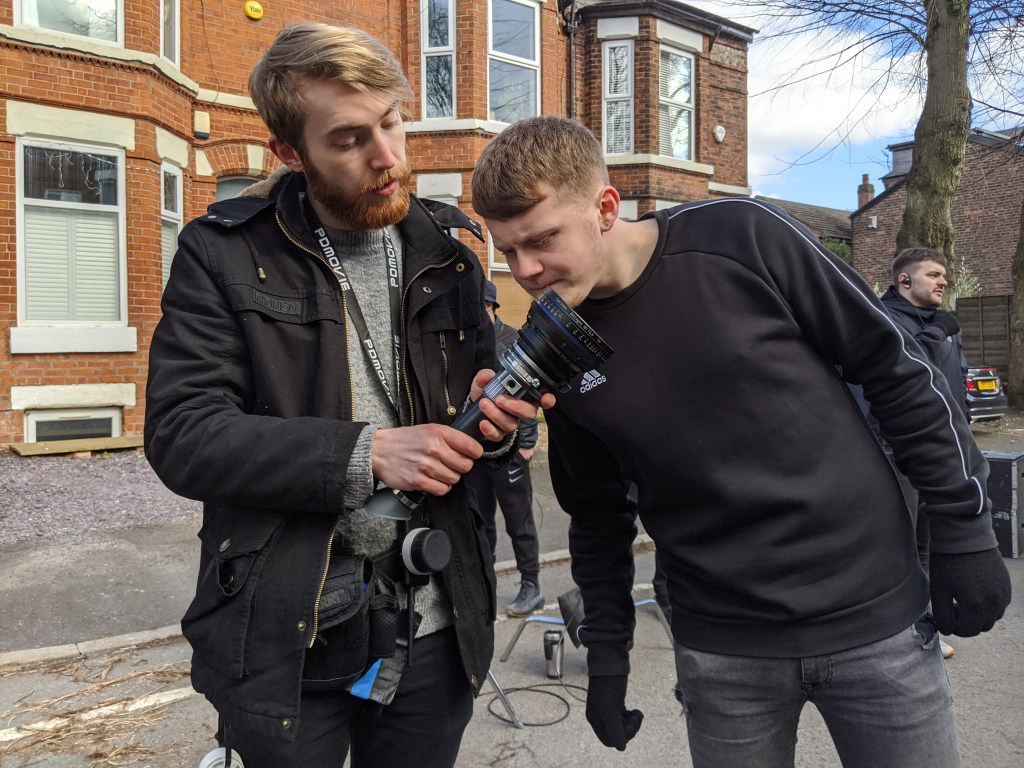
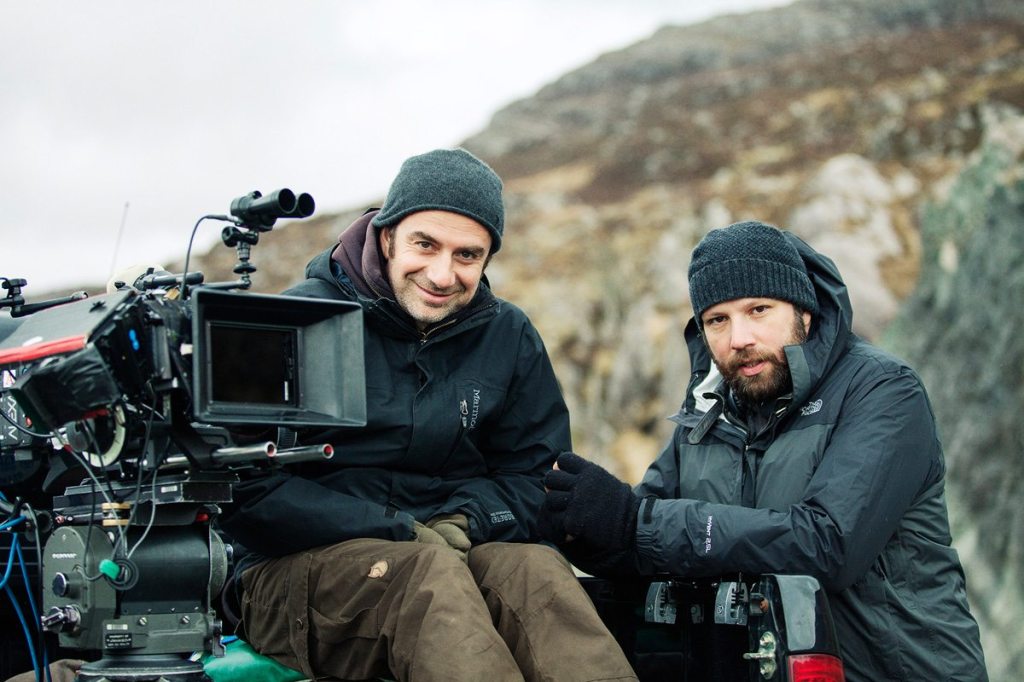
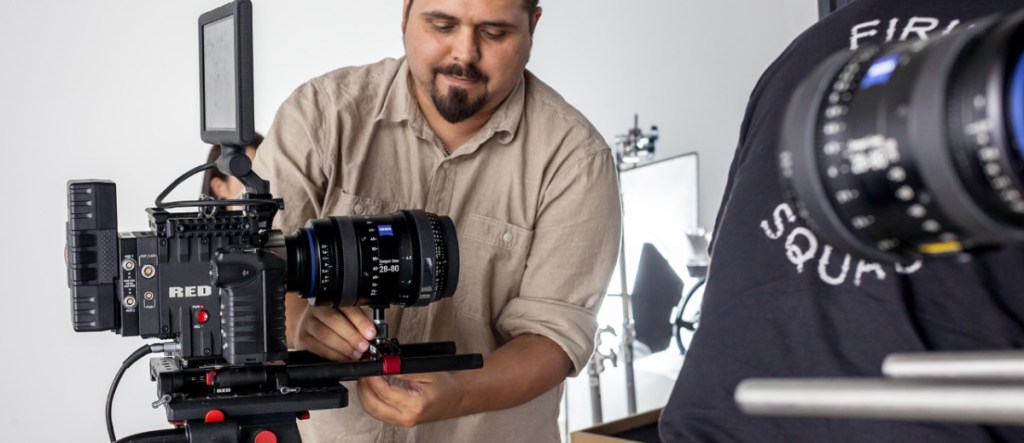
The Equipment was supplied by Lens Flare TV (LensFlareTV, 2020) a Manchester based Rental/Crew Hiring company who lie in the surrounding area of Salford Quays. I have worked with the guys down at Lens Flare before, having used their equipment on many shoots I have been on working for KAMFilm. However, this time it was different. Freelancers Simon Making and Daniel Spencer, who are part of the company announced on the day that they were going to be joining us on set with to observe how we work and to make sure that their equipment is being used correctly and being looking after by KAMFilm crew. (More information about LensFlareTV can be found in the ‘RKID‘ section of this website)
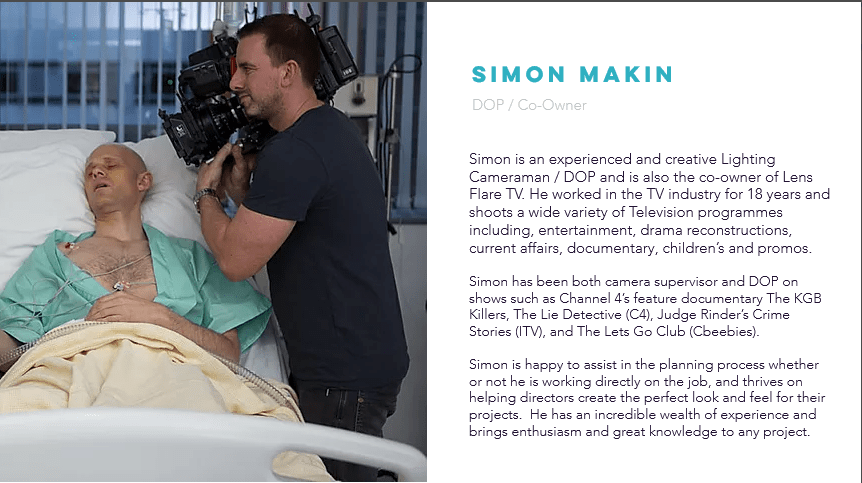
Simon Makin – DOP/Co-owner
Simon Makin, DOP/CO-Owner of LensFlareTV
Simon Makin (IMDB, N.D), is the Director of Photography and Co-owner of the company LensFlareTV. He has had many years in the industry working within the camera department, producing most of his work as a DOP. His most recent project was the ITV hit show, Judge Rinders Crime Stories, in which he DOP’d all 9 episodes.
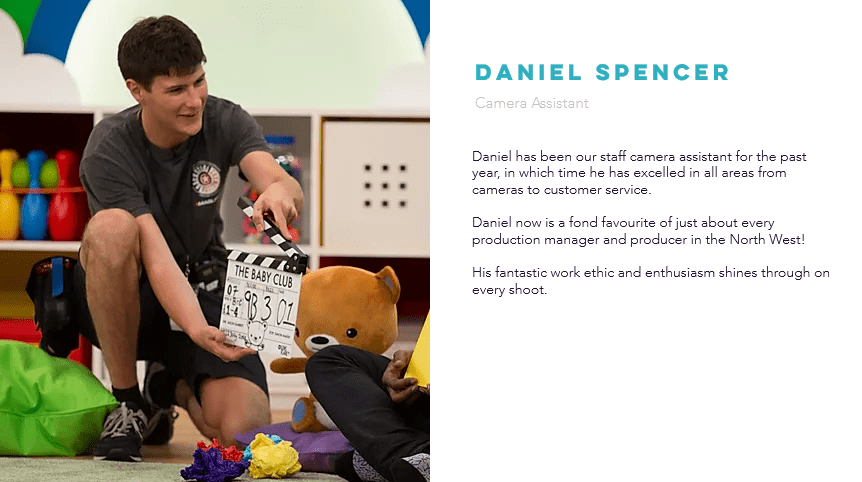
Daniel Spencer- Camera Assistant
Daniel Spencer, Camera Assistant for LensFlareTV
Daniel Spencer (IMDB,N.D), is one of many Camera Assistants who work for LensFlareTV. Since joining the company, he has worked on shows such as, Come Dine with Me and Baby Club, two well known daytime TV shows. He graduated from university, with a 1st class degree in Film Production Technology (BSc) and since then has been able to develop his learning and technical skills through LensFlareTV.
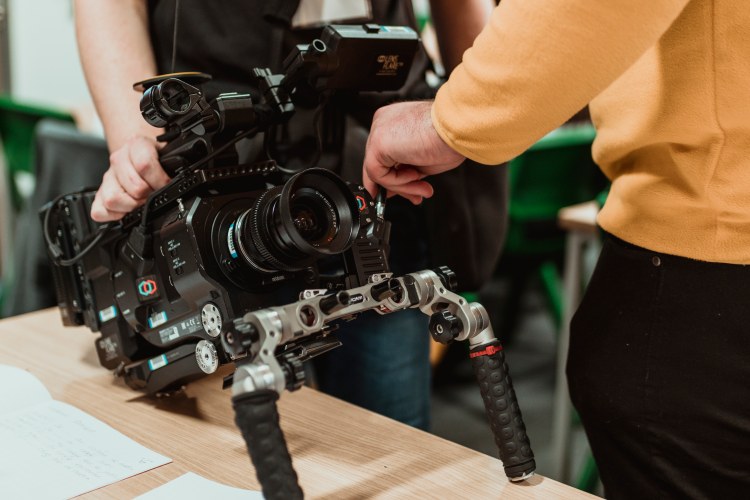
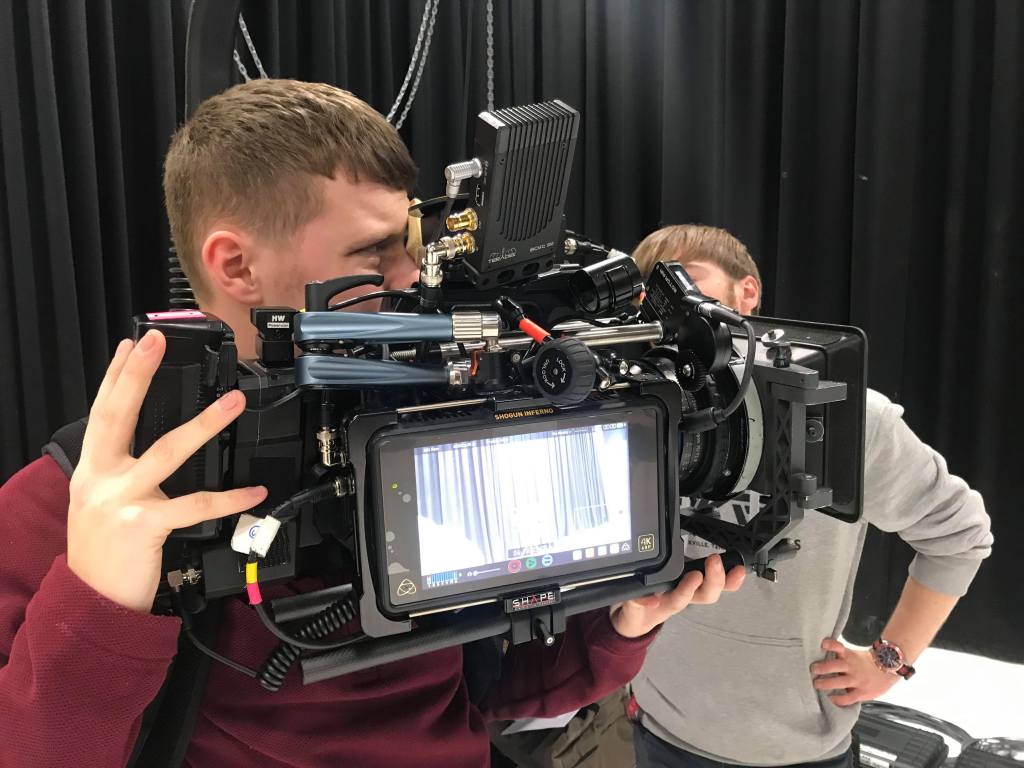
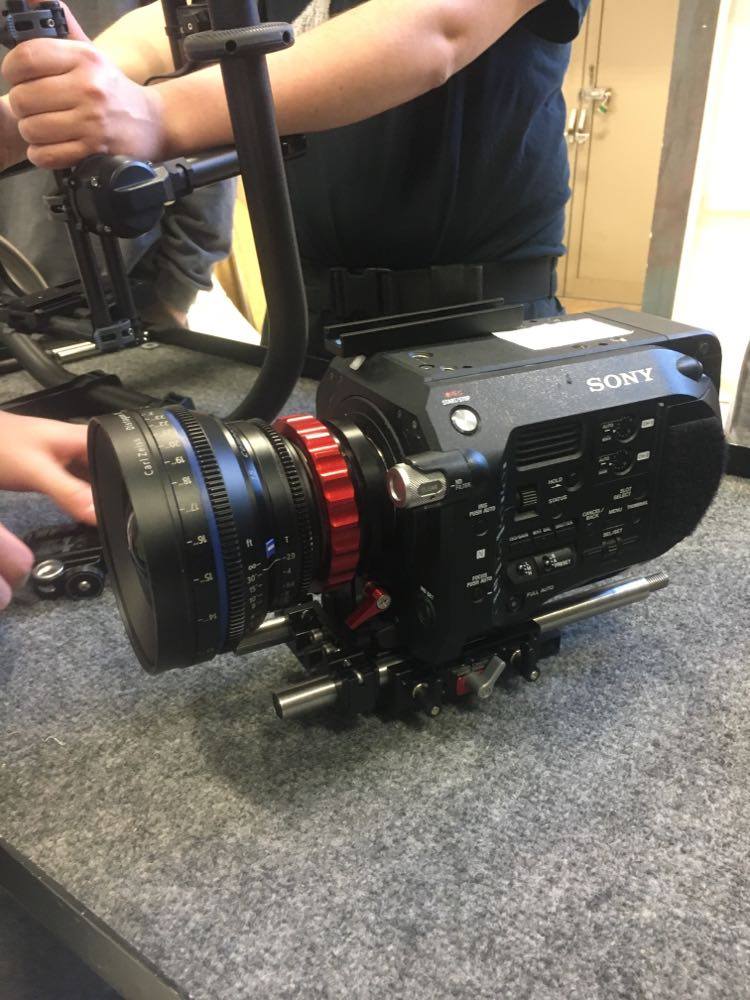
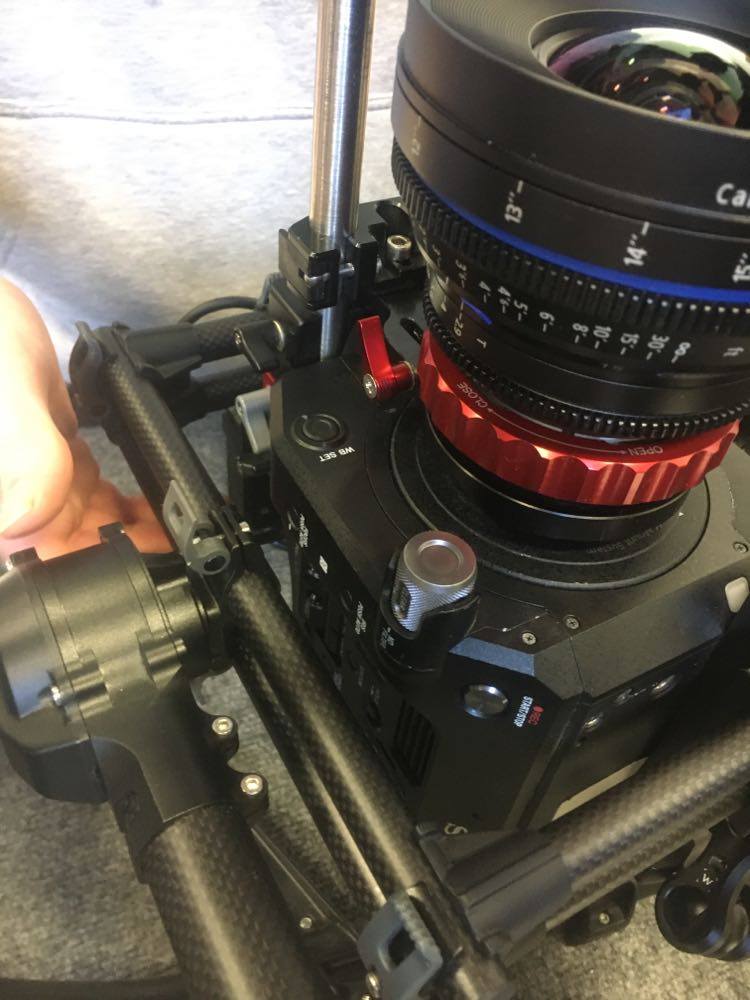
The Camera…
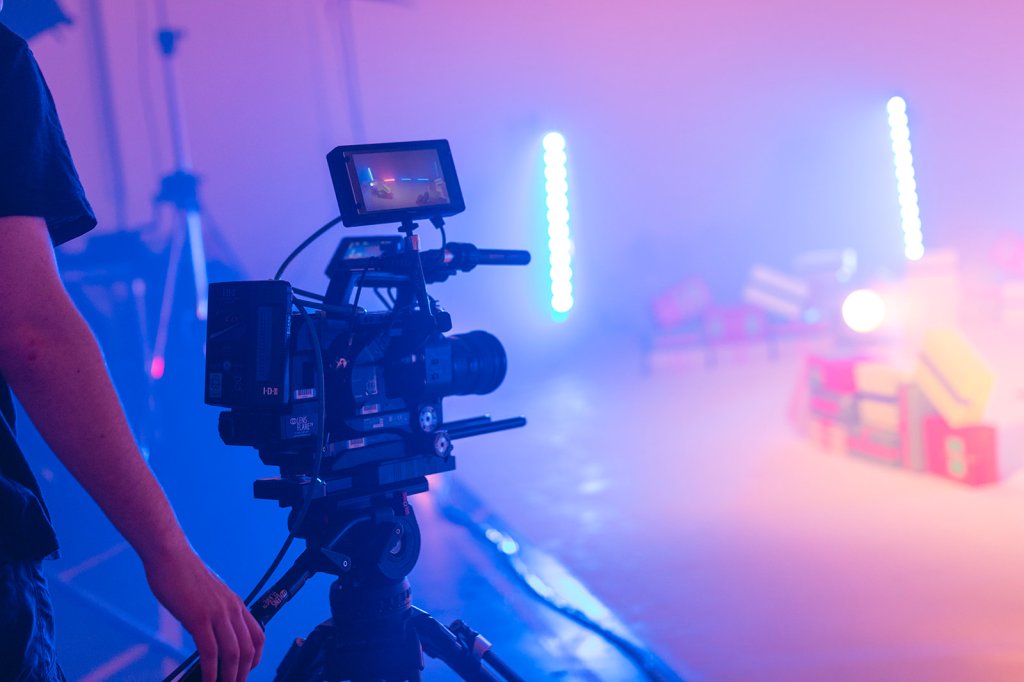
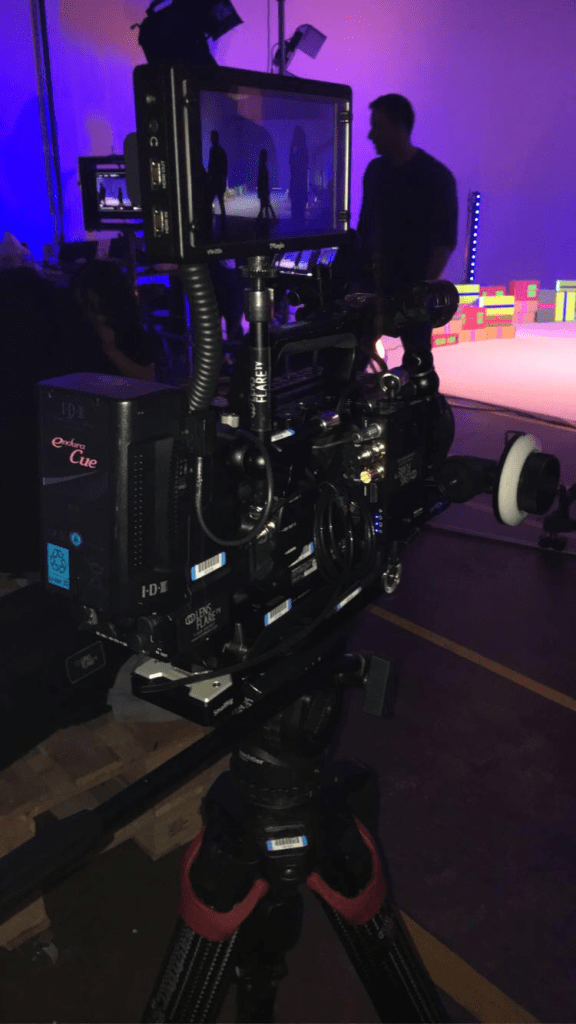
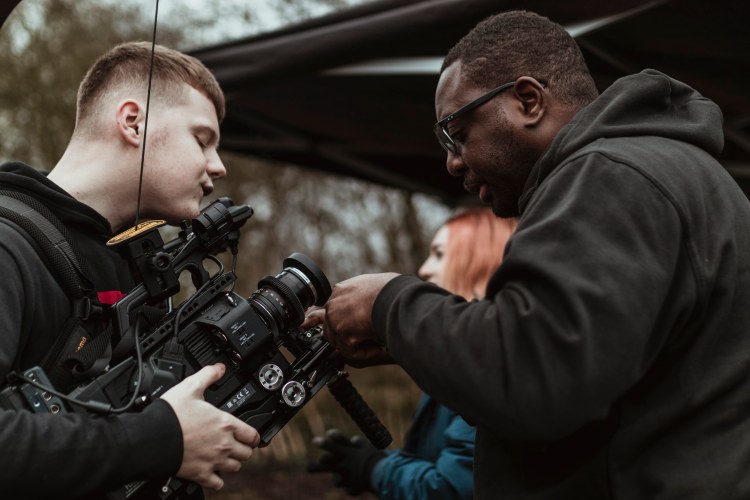
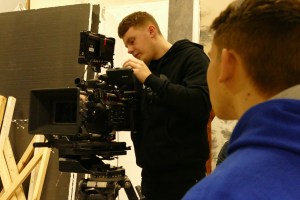
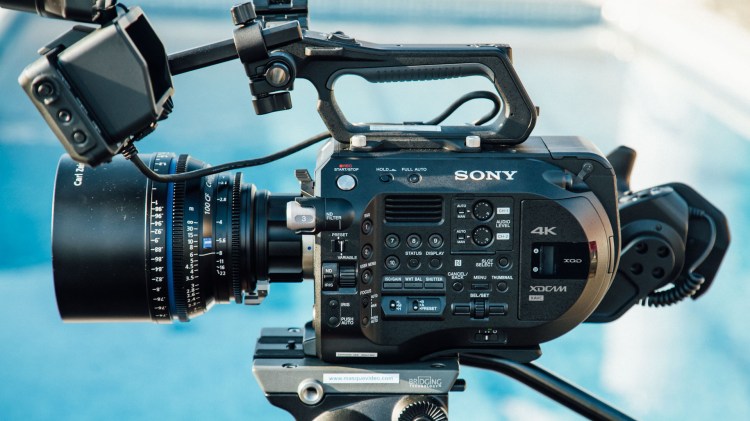
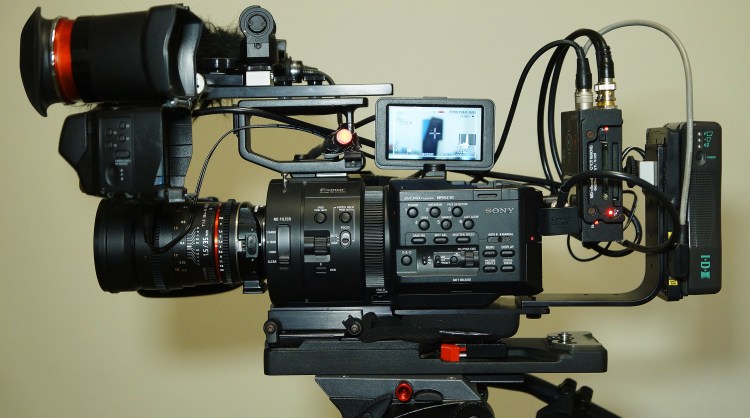
We were using x2 Sony FS7 MKII(Sony, 2020) which came to my advantage as rigging one of these cameras, was something I am rather good at. Over the last 3 years at The Manchester Film School, our main camera has been the Sony FS7, which meant that on this shoot I could impress Simon and Daniel with my understanding of the camera. I made sure that what I had learn back at the film school, I was demonstrating here today on location. Once the cameras and lighting were set up and given the go ahead, the pair could leave and we began with filming.
Sony FS7 MKII with a Cannon 24-70mm zoom lens
Back to the shoot…
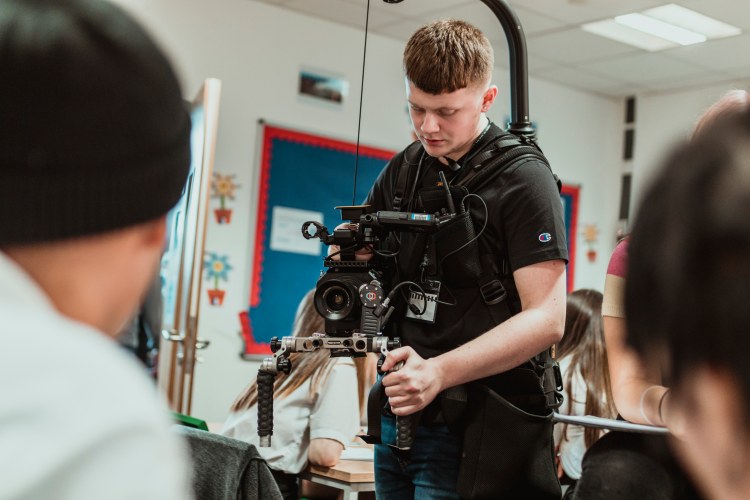
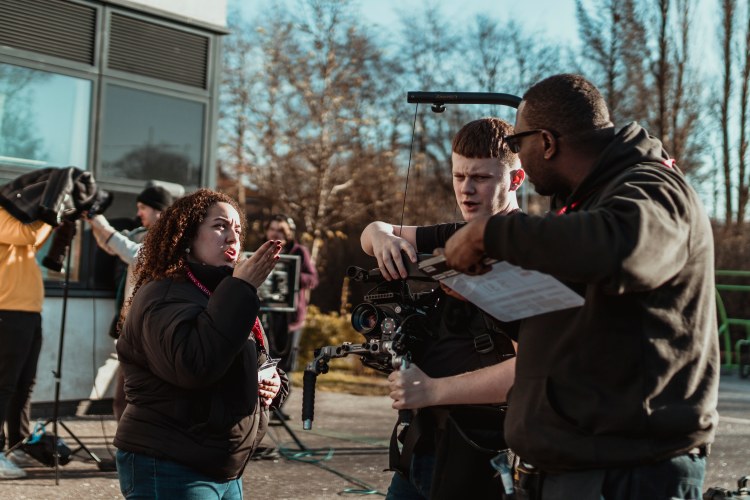
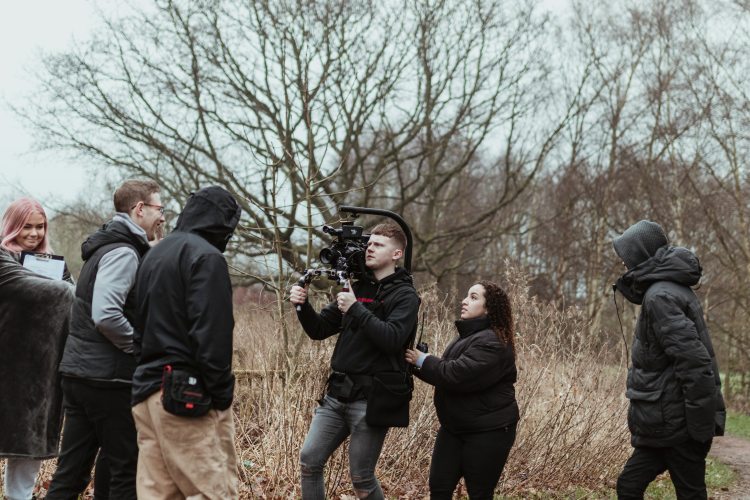
This shoot was a two camera set up which at first, was a little tricky considering where the DOP wanted us to be placed on set. A Cam (Alex and I) were on freehand via an Easy Rig (Easyrig, N.D) and B Cam (Freddie) was on sticks but attached to a Libec Track covering the wide shot. The problem occurred when Freddie, being on the wide, continuously caught me and Alex in his framing. We needed a quick solution to this problem and it came to me straight away.
A CAM- Lewis Kyneston
B CAM- Freddie Johnson
To overcome this problem we decided to work out a way of getting Freddie to one side of the Track whereby me and Alex would not be seen. This is the way we worked it…
– When Freddie would crab to one side of the track, it meant that I could push in closer to the talent, to capture my defining shots of faces and body gestures. When Freddie would crab to the opposite end of the track, I could pull out which meant that he could capture his wides easier, allowing me to experiment with different camera movements from the outside.
– The way in which we managed to communicate with each other was through hand gestures (P2 NOS). Even though we were not recording sound, we still decided that by shouting across the set to one another, it was not the best way of going about this as it could cause disruption to the talent and put them off. Alex and Freddie were able to give hand gestures to each other, which meant that both our timings were spot on and no one was caught in any of the framing.
In the book, The Camera Assistant, there is a section surrounding distraction to Directors and Actors. It says;
“It is Vital that the actions and movments of the Camera Assistant should not distract the actors from their performances.” (The Camera Assistant, 1995)
In our case, we were still able to communicate with others on set through hand gestures and signals. We knew that by doing this, the actors could still perform to a great standard without being distracted by anything going on outside of their line of vision. (APPENDIX 8)
Not Trending Comparrison
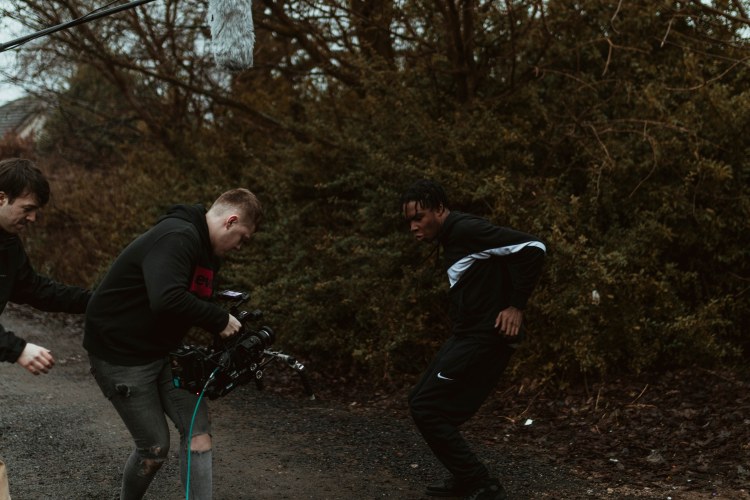
This shoot was similar to Not Trending, whereby we had a Multi Camera Set Up, however there was a difference in the types of shots we were capturing. Not Trending was basic and formal as we completed a standard three camera set up consisting of a wide and two side shots. In comparison to this shoot, I was able to be more creative with my operating due to the type of shoot that it was. I had an Easy Rig attached to my back which meant that the camera was stable even though I was throwing it around to capture the shots. I could make certain shots Dutch, a type of shot whereby the camera tilts onto an angle which adds that little more slickness to the final image.
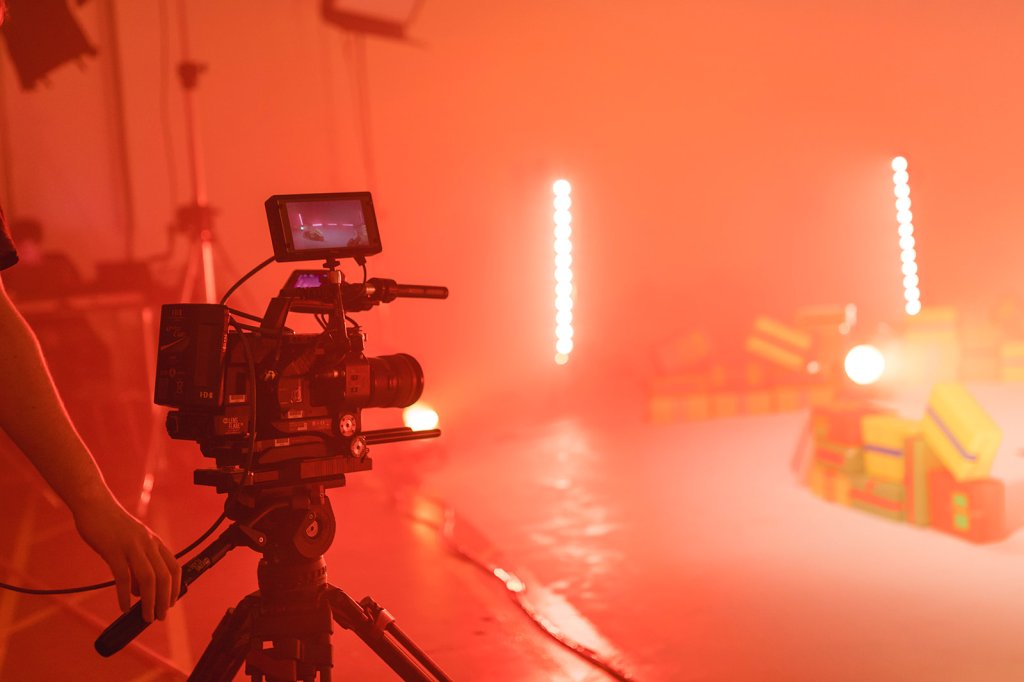
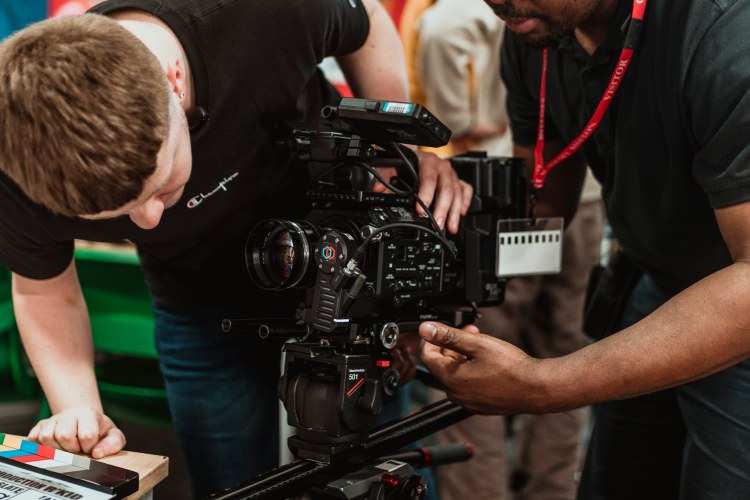
Shooting at 100FPS
When we arrived on set I had a conversation with Simon and Kylo, whereby they told me that I was going to be shooting A Cam at 100 FPS as to 25. In the cameras menu’s(P6 NOS), S&Q mode (slow&quick) it set at 60 FPS. In order to raise this to 100, I had to make sure that my recording format and ouput was correct, which meant the camera would then allow me to raise it up to the selected number, 100.
The reason for shooting at a higher frame rate, was so that when put into the edit, we could mix takes between slow motion and fast paces to create that music video vibe. Had we been shooting at 25FPS throughout, the edits would have looked boring and simple to the audience. By shooting at 100FPS it gave us that freedom to be creative and to produce a more professional, stand out edit for the Ash Company to use for promotion to any potential buyers.
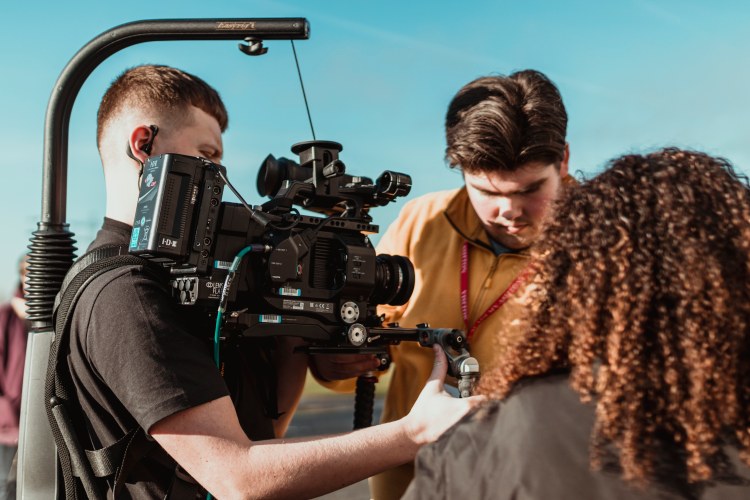
The video below is just one example of an artist we recorded. Keep an eye out for the slow motion I captured via the S&Q setting.
Sony FS7 S&Q Mode
The Sony FS7 allows you to shoot in S&Q (slow and quick) mode, varying its frame rates from 24 all the way to 240, depending on its recording format and external drive. In a video created by Sony, Alister Chapman (Sony, N.D) explains how you can shoot at different Frame Rates depending on your recording format, showing which formats allow you to shoot at certain Frame Rates on the camera. (Youtube, 2015)
In our case, we only wanted to be shooting at 1080p. In order for me to do this and raise out frame rate from 60 to 100, I had to set the recording format at XAVC-I, which enabled me to select an output of 1920x1080p. From here, I could then go back into the S&Q menu and raise its number to 100. Had I not selected the correct recording format, the camera would not have allowed me to adjust its frame rate from 60 as explained by Alister in the video above. Your recording format must match your recording output for this adjustment to be made.
W. Ashley Maddox- Sony FS7 fan
W. Ashley Maddox, a fan of the Sony FS7, shares his thoughts of the cameras high frame rate options. In an online article written to Newsshooter.com, Moddox says;
“One of the most exciting things about Sony’s new FS7 is the high frame rate options it has. Recording internally it will shoot a top speed of 60FPS in Ultra High Definition (3840P) and 180 FPS in High Definition (1080P)” (NewsShooter, 2015)
He goes onto talk about how he believes you can get the best out of your frame rate options on the FS7, explaining in detail other areas in the cameras menu’s that you can adjust, to increase your frame rate even more(APPENDIX 9)
-P2 discuss and agree your tasks and responsibilities in a way which promotes good working relationship
-P10 tactfully request others to modify or change working arrangements in order to improve your own productivity
-P13 maintain good relationships, even when disagreeing with others
-P14 find workable solutions for any conflicts and dissatisfaction which reduce personal and team productivity
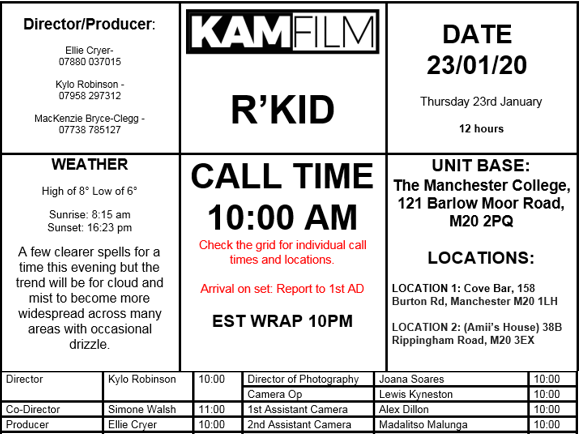
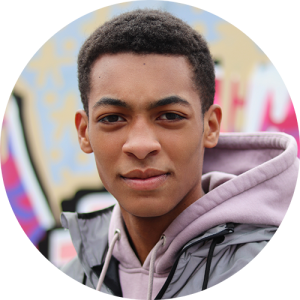
R’kid, is a short film, which is in the process of becoming a mini series that is produced by KAMFILM Productions (KAMFILM, 2020) in the UK. The story is about a boy named Ashley, who dances for a hobby, but turns to the dark side and gets in with the wrong crowd where he results to committing crimes to help keep himself and his mum alive. His mum is covered in debts and chooses to pay them off in ways she shouldn’t have to. Ashley does all he can to help the pair get through life but can only do so much. Everything happens in a beat.
Who are KAMFILM?
Official KAMFILM Logo
KAMFILM (KAMFILM, 2020) are a Manchester based production company who offer future industry workers the chance to develop their skills in their area of interest. They offer support, and encourage people to overcome potential challenges independently. People can learn from their mistakes in a nurturing environment that promotes self awareness and guides those who are in need.
Kylo (LEFT), Kenny (RIGHT)
The company was created back in November 2017 by Kylo Robinson & Kenny Bryce- Clegg (KAMFILM, 2020) who at the time were still studying in college. They came up with the idea of putting together their own production company, with the aim of eventually having their own inhouse team. Since then they have worked on projects with a range of different clients such as the UK rap artist Aitch (IMDB, 2020) and the clothing company Boohoo (Boohoo, 2020).
KAMFILM Instagram
KAMFILM Show reel 2020
As well as making their own content, they are a company who strive when working alongside businesses to produce online content for social media platforms such as Twitter and YouTube. In an About page on their site, they say:
“At KAMFILM we aim to amplify your online presence to help you attract attention in an oversaturated market. We offer a variety of videography and editing services to help both business and personal brands advertise their identity and products.” (KAMFILM, 2020) (APPENDIX 3)
Having worked with KAMfilm over the last year, I have created content for dance companies such as, The Ash Company (ASH, 2020) who have recently had one of their young, talented dance groups appear on the ITV talent show, ‘Britain’s got Talent’. I have also shot a JD Concept video which will be given to the clothing company JD Sports(JD Sports, 2020), to be potentially used as an advertisement for some of their products.
Lens Flare TV…
Official Lens Flare TV Logo
CLICK ON THE LENS FLARE LOGO ABOVE TO VIEW SHOWREEL
Lens Flare TV (Lens Flare TV, 2020) are a Manchester based kit hire and crewing company who have worked along side KAMFILM since the start. All equipment used on KAMFILM productions is supplied by Lens Flare, who are regularly updating their equipment with the most up to date technology.
Over the years, Lens Flare have worked on many popular television shows, and have recruited many talented individuals to join their crew (Lens Flare TV, 2020). They have been involved with shows such as: The Voice UK; Dress to Impress; Ninja Warrior UK;The One Show and Dickinsons Real Deal.
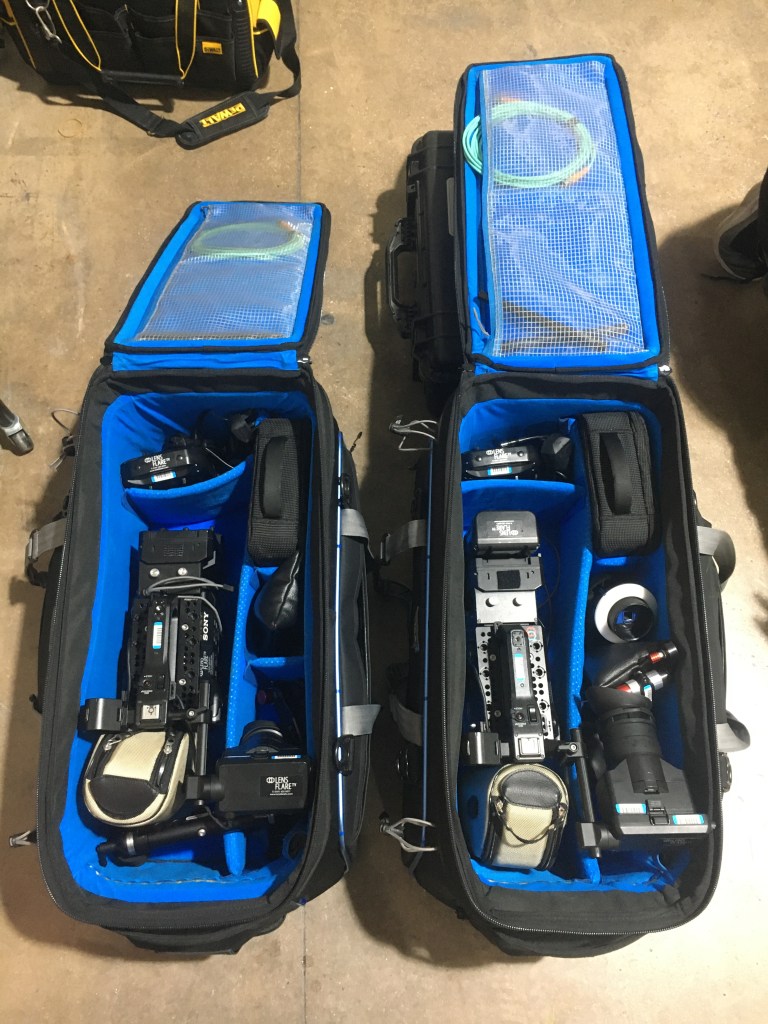
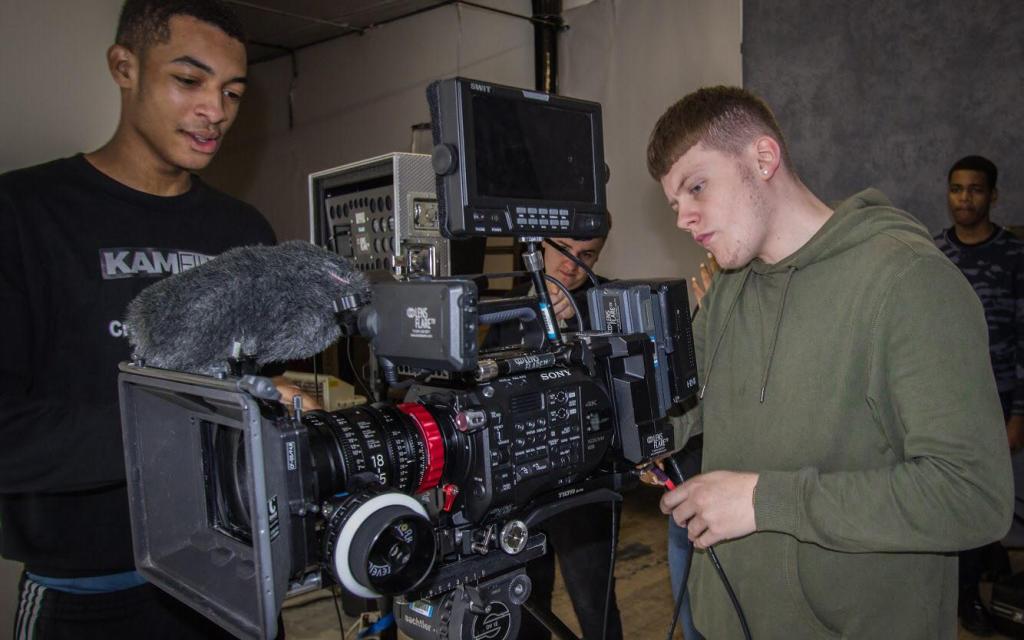
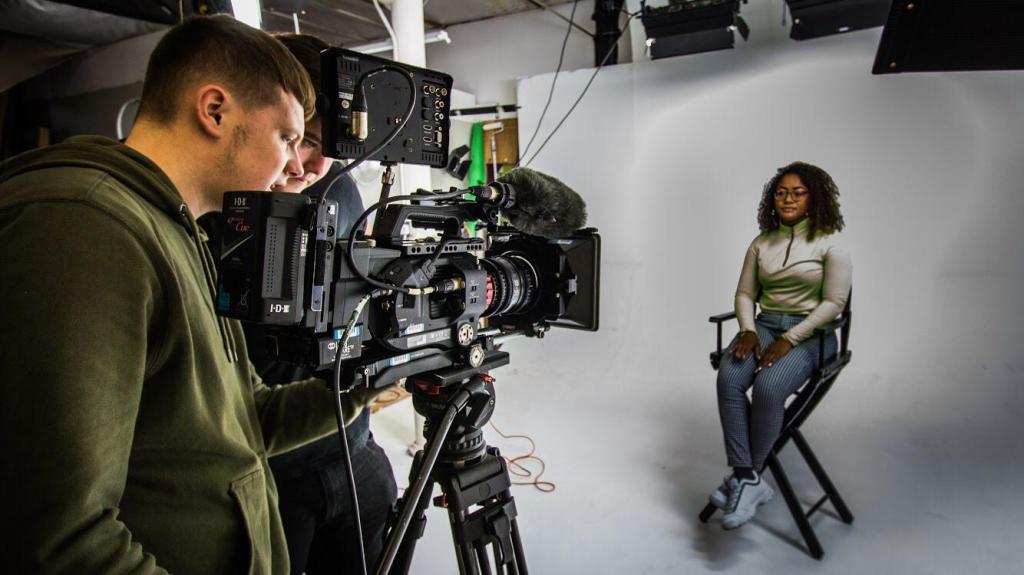
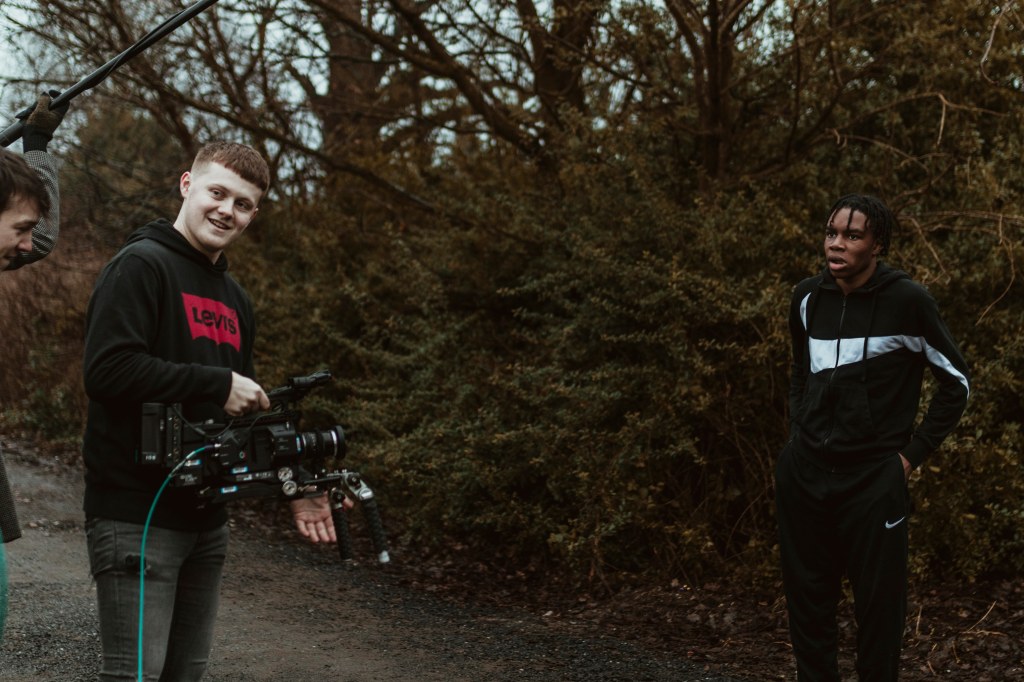
These images were taken from a KAMFILM project that I have recently worked on. The camera package was supplied by Lens Flare; being rigged and operated by myself. The final results are displayed below.
CAMERA: Sony PXW-FS7 MKII LENSES: Sigma 18-35mm T2 & 50-100mm T2 Set
The Shoot…
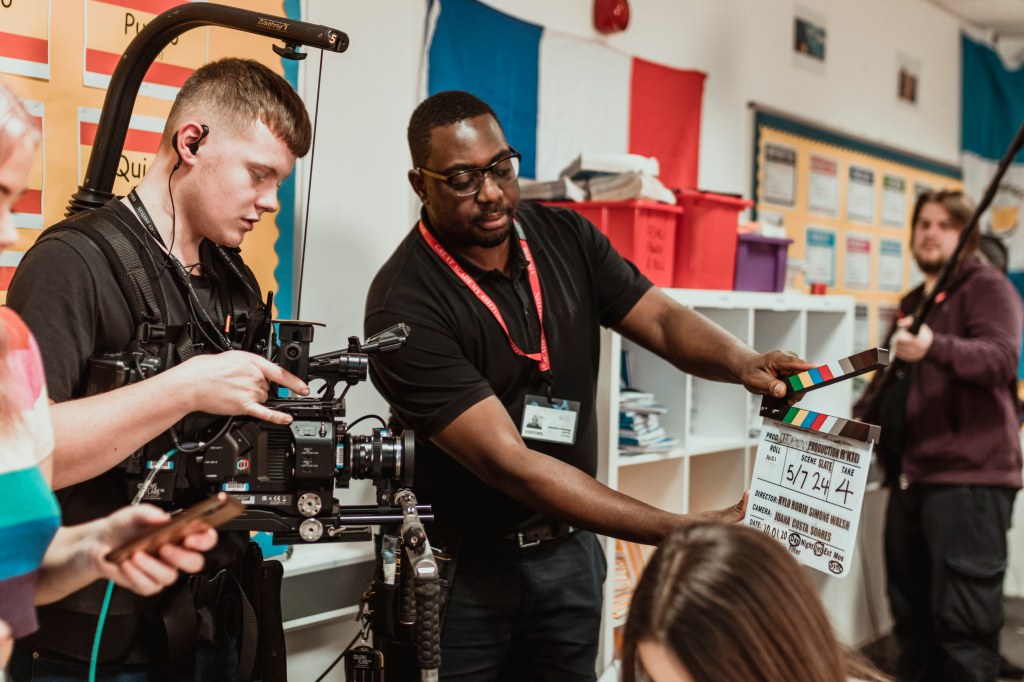
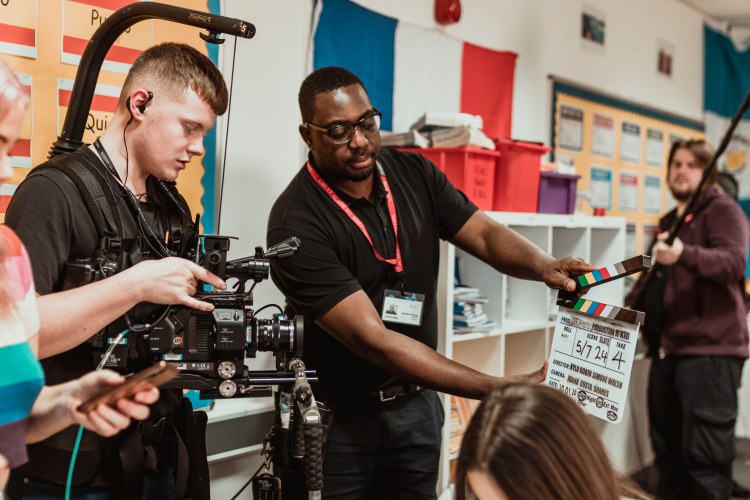
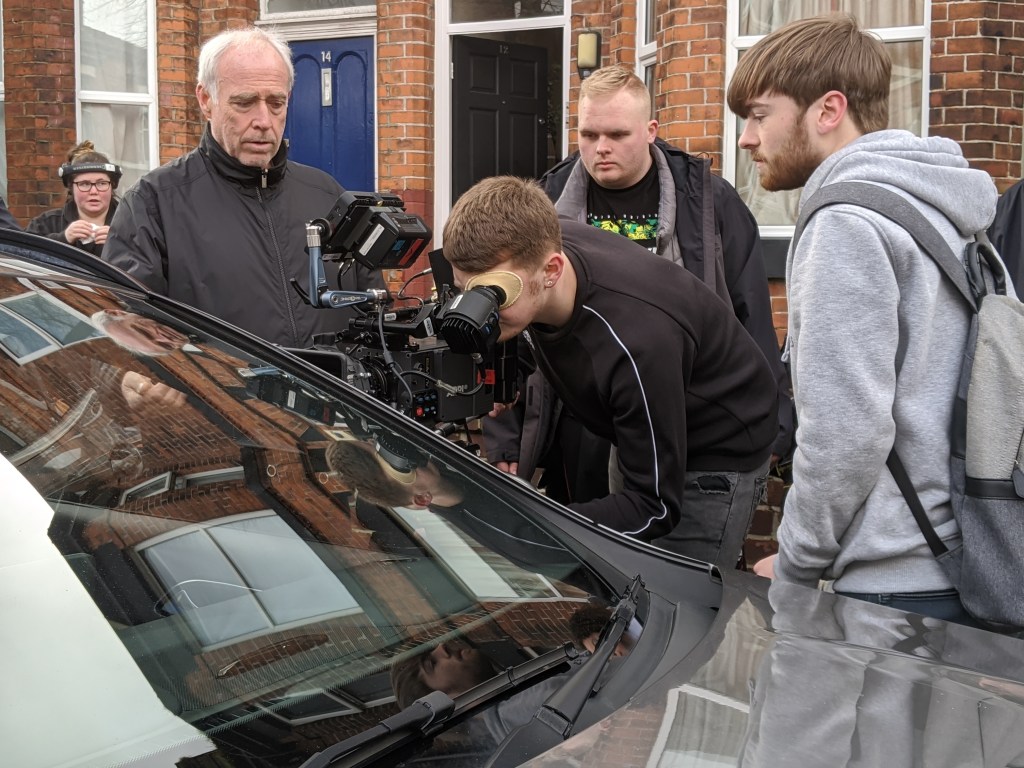
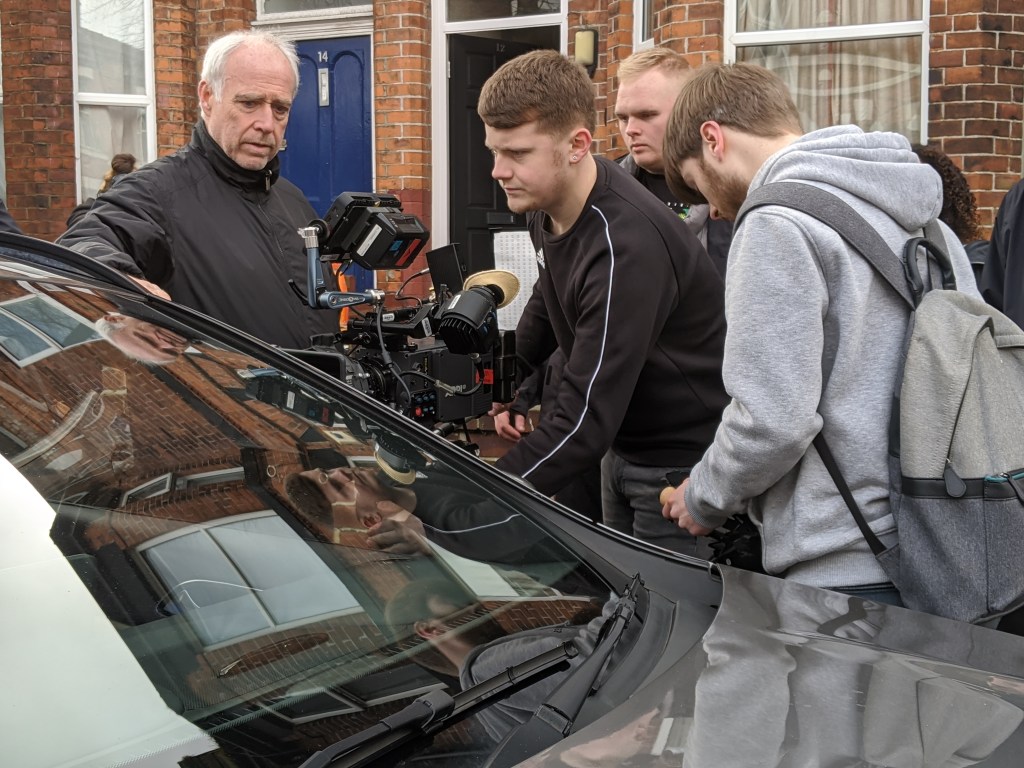
Day 3, shooting classroom scene between Ashley and friends
Day 7, sizing up my frame for the last shot of the shoot, making sure it was shot to perfection
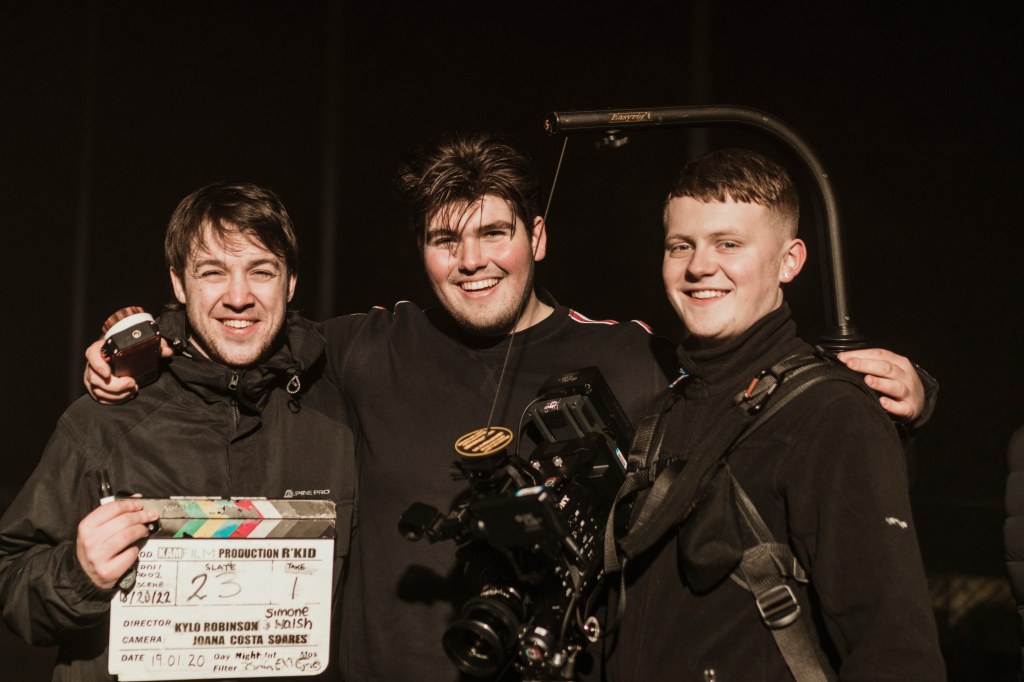
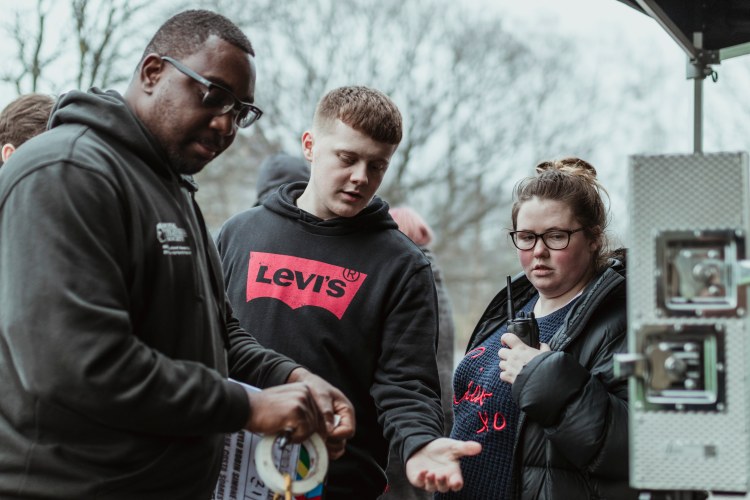
This was the first time that I had worked on a full crewed shoot with both Kylo and Kenny, having previously worked on smaller projects with the pair. Upon arrival to the set, the DOP, informed me that a shot list and photo storyboard had not been made. I explained how important a shot list was relative to what I needed to shoot. To resolve any potential complications resulting from the lack of camera preproduction, I suggested that I would look at the script, and use the actions to give me an indication as to the type of shots that we would need (P10 NOS). If a Shot List had been made, the days filming would have been more efficient and potentially more effective.
Importance of a Shot List…
Having worked on many projects at The Manchester film School, I have become very aware of the importance of a shot list. There have been times where they have and have not been made, and I can confidently confirm that having one makes your shooting days much easier. The shot list only needs to be a brief outline of what shots need to be captured on different days. It makes all the difference between a good working day and a bad one.
Tanner Shinnick(Tanner Shinnick, 2020)
Tanner Shinnick, is an Atlanta based Director/ Director of Photography who has worked on many branded commercials in America such as, PlayStation, Totoya USA and PGA Golfiing.
In an online article written by Tanner himself, he explains why a shot list is needed and just how crucial of a part they play to a production. He says;
“A detailed shot list will save your production time, energy, and effort, and (most importantly) it will help help you create a better product.” (Premium Beat, 2018)
He also backs up my point about how a shot list will make your production run much smoother by saying;
“A shot list is one of the most important assets you can bring to a set to ensure a smooth and efficient production. The more preparation you put in before you shoot, the better your end product will become.” (Premium Beat, 2018) ( APPENDIX 4)
David Lee (YouTube, 2019)
In a short video by youtuber David Lee, he gives reasons as to why he uses a shot list in his work. He provides an example of one that he has made; showing just how simple they can be.
In comparison to Tanner Shinnick, David Lee does not explain details on lenses or camera movements within his shot list, he focuses more on the photo and how the shot will look. I feel like Tanners detailed shot list would be the route I would follow, as the more detail you can include on your shot list, the easier your shooting days will be for the whole crew.
Back to the shoot…
Day 6, Hand Held shot of Ashley freestyle dancing.
Days 1 and 2 of shooting were a success despite the lack of documentation. However, after two days, the DoP had failed to act on my advice, and had still not provided me with the resources that I had requested. Unfortunately, problems arose on day 3 of the shoot when on location at a school.
Having no shot list, it was essential to hold a meeting with the camera team to ensure that we were ready and fully equipped when going for takes. We had everything to hand that we might have needed, and pulled off a good performance on the day.
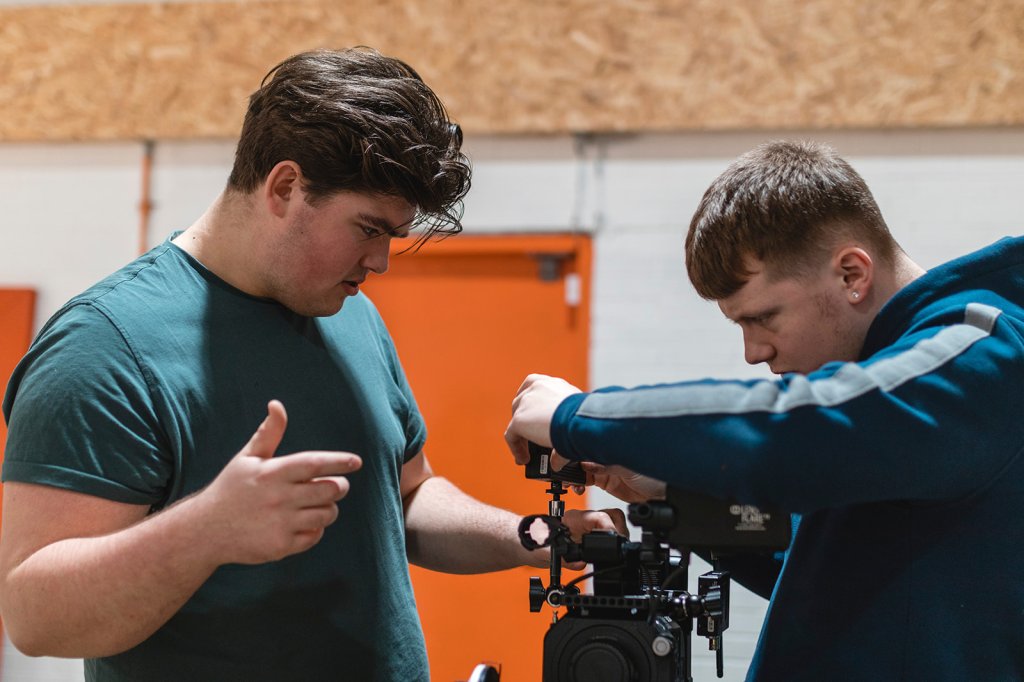
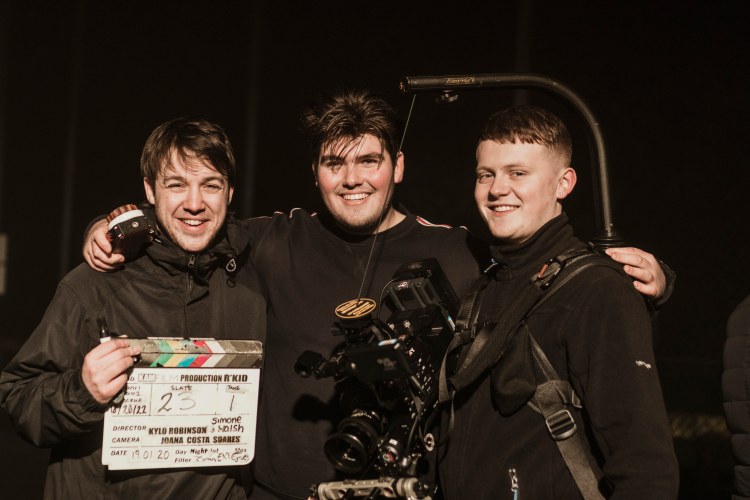
Freddie (LEFT)- Grip/loader Alex (MIDDLE)- 1st AC
Lewis (LEFT)- Operator Mada (RIGHT)- 2nd AC
Throughout days 1 and 2, I noticed that Kenny our 1st AD was performing his role very differently from what I had seen from other AD’s. He was unaware of the individual roles of others on set, and how people liaised with each other to establish what had to be done within a certain time frame. It was apparent that this was the first time that he had properly AD’d on a shoot; he did not understand the roles and responsibilities of certain crew members, and this needed addressing.
Script Supervisor Isobel and I were discussing continuity; an aspect that Kenny did not deem as being important. He insisted that we continued with the shoot, and inferred that we were wasting time. He was confrontational in front of the actors which was unprofessional and at times embarrassing. During lunch, I politely pulled Kenny to one side (P2 NOS) and explained exactly what Izzy and I were talking about. I explained that a Script Supervisor is the eyes for the Editor, and that without continuity the film would not be worthy of showing to external workers; if they were to get further work from this project.
Martha Pinson (IMDB, 2020)
Martha Pinon, a Script Supervisor who works along side Martin Scorsese in his movies, shows us exactly what a film would look like if continuity had not been there. She gives examples of errors which had not been looked over by a Script Supervisor and makes it clear just how important their role is to a production. (Youtube, 2018)
Set Etiquette
Something he needed to learn before the shoot, was set etiquette
A quick example…
There was a time on set where we were a little behind in time and to try and push on, Kenny got involved in moving certain props in the room. This was not the correct call from him as it resulted in more time being wasted as art department then had t come in and put the objects back into their original place. Rule number 2 of Set Etiquette is to stay in your own department.
According to The Camera Assistant;
“Rule #2, “stay in your own department!” is also an important concept. It is a natural tendency to want to help out fellow crewmembers, but 90 percent of the time, other department do not need or want the help” (The Camera Assistant, 1995)
Back to it– Guerilla Filming
Over the first 3 days, it was clear that there was a vast amount of tension on set, To resolve this , we had an emergency crew meeting back at university (P14 NOS) to allow everyone to air their concerns.
An online article written to FilmmakersFans.com says that;
“Guerilla film making is a rebel without a proper crew, budget or props using whatever is available. The advent of digital cameras and computer editing software were like blessings to these filmmakers.” (Filmmakersfans, 2015)
After having the meeting, it became apparent that prior to Kylo and Kenny joining the Manchester Film School, the way in which they worked back in college was ‘Guerilla‘ Style. This meant that they would go out with a camera and film something, no matter what the circumstances were. They were not taught the correct way of filmmaking, and when coming to the film school they had no understanding of roles/responsibilities; the legal side to filmmaking; copyrighting brands etc. They now had to adjust their way of working (P13 NOS) in accordance to how a proper film crew works.
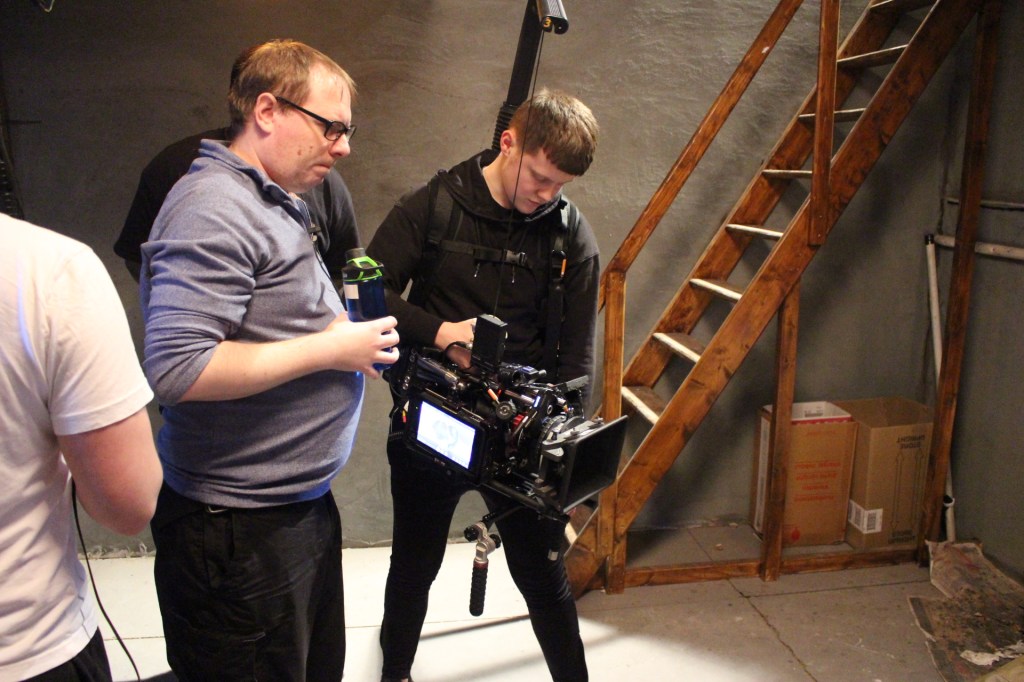
A Fresh Start…
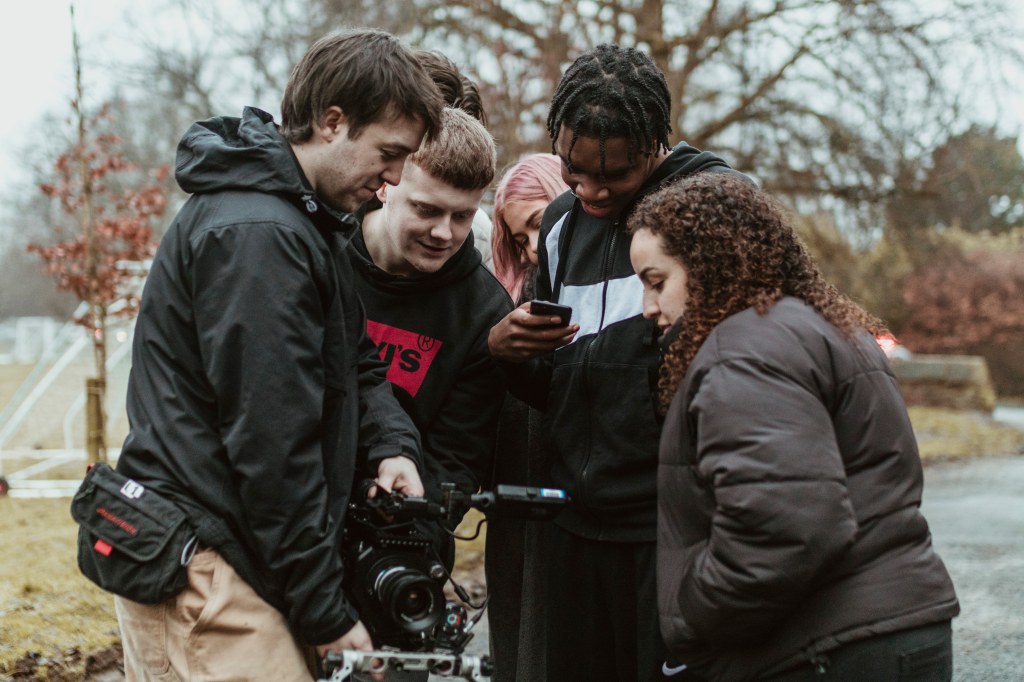
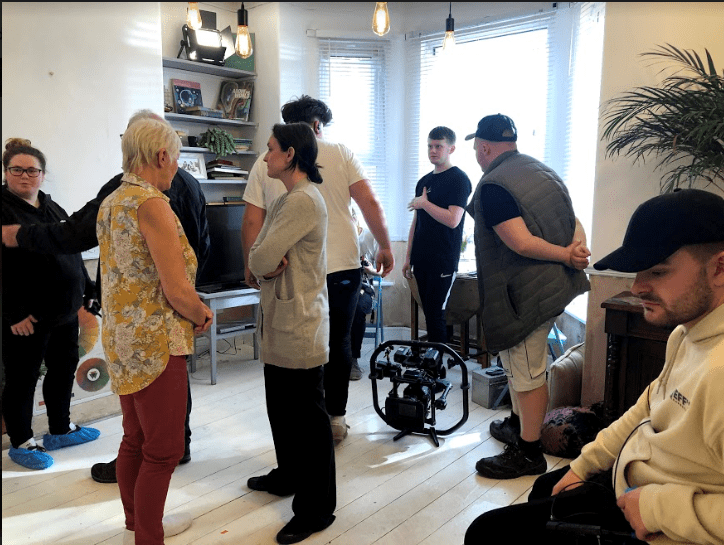
The crew looking at a take of a hand held dance shot I just captured on Day 6.
Following the meeting, the remaining 3 days of the shoot were successful. There were no dramas or confrontations, nothing but pure filmmaking and good relationships were displayed by the crew. I couldn’t have been more proud by how everyone handled themselves.
Reflection…
If I were to approach the shoot again, I would start by making sure that I have more of an input during pre production stages. Even though it is not my responsibility do be doing paper work etc, my experience as a 3rd year student would have been extremely helpful; ensuring that this stage of the production was completed in the correct way.
I feel like the way I handled certain situations during the shoot was done in the correct way. I kept peace throughout the crew and continuously reassured everyone that things were going to get better with time. I was proud of my role as an Operator. I feel like I put everything I possibly could into this project, given the circumstances, and made sure that all my knowledge and skills gained over the last 3 years were put to excellent use during this production.
The Edit
The crew are still awaiting an edit from KAMFILM, after multiple attempts to obtain one. After speaking to Kylo and Kenny I am now aware that an edit has not been made, nor a rough cut.
I have made my own short edit of a clip montage(Youtube,2020) with the shots I have been given by Kenny. I feel as though this is a lack of professionalism from production, as the shoot ended just over 3 months ago and an edit has still not been made. I feel like if the business is to work, hierarchy needs to be able to meet deadlines for crew members as, everyone on the shoot is now without an edit for their coursework as evidence they were on the shoot. If the crew are giving their all to the production, the least we deserve is a rough edit to evidence our work within our assignments.
NOS- C4 Obtain, prepare and return camera equipment
Performance Statments
– P9 where practical, test equipment on delivery
– P8 check that equipment matches documentation, and, where it does not, seek solutions, (Link to P17)
– P17 store and handle items safely
NOS- C2 Specify camera equipment required
Performance Statments
– P8 ensure that appropriate camera testing has been carried out
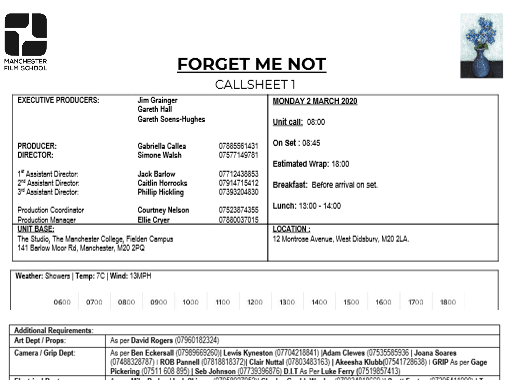
Day 1, Opening establishing shot from across the road
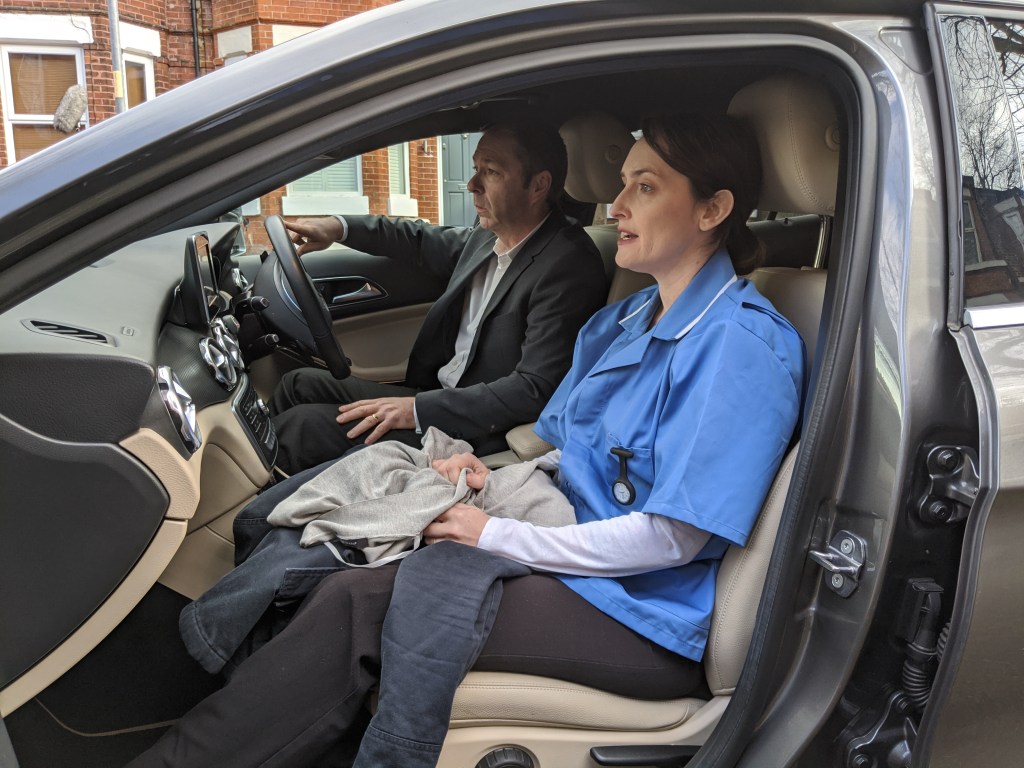
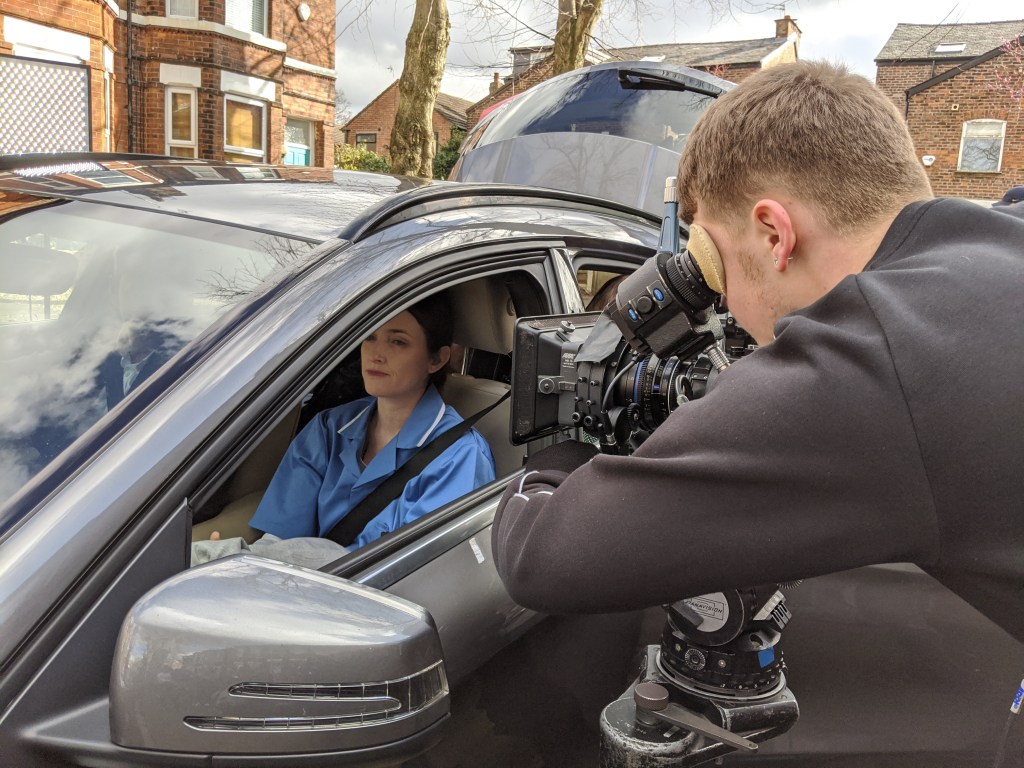
Angela and Ronan getting into character for their first scene of the day
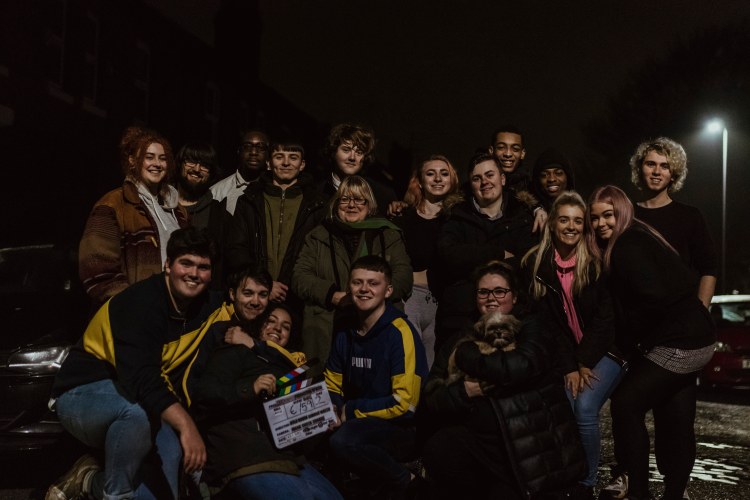
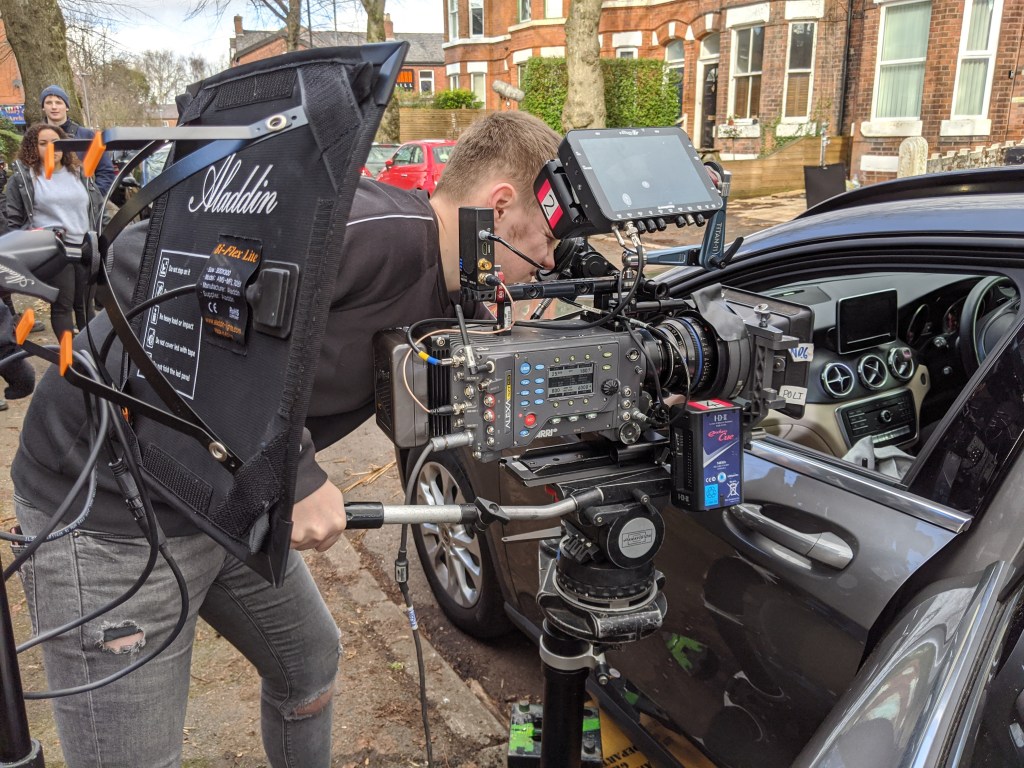
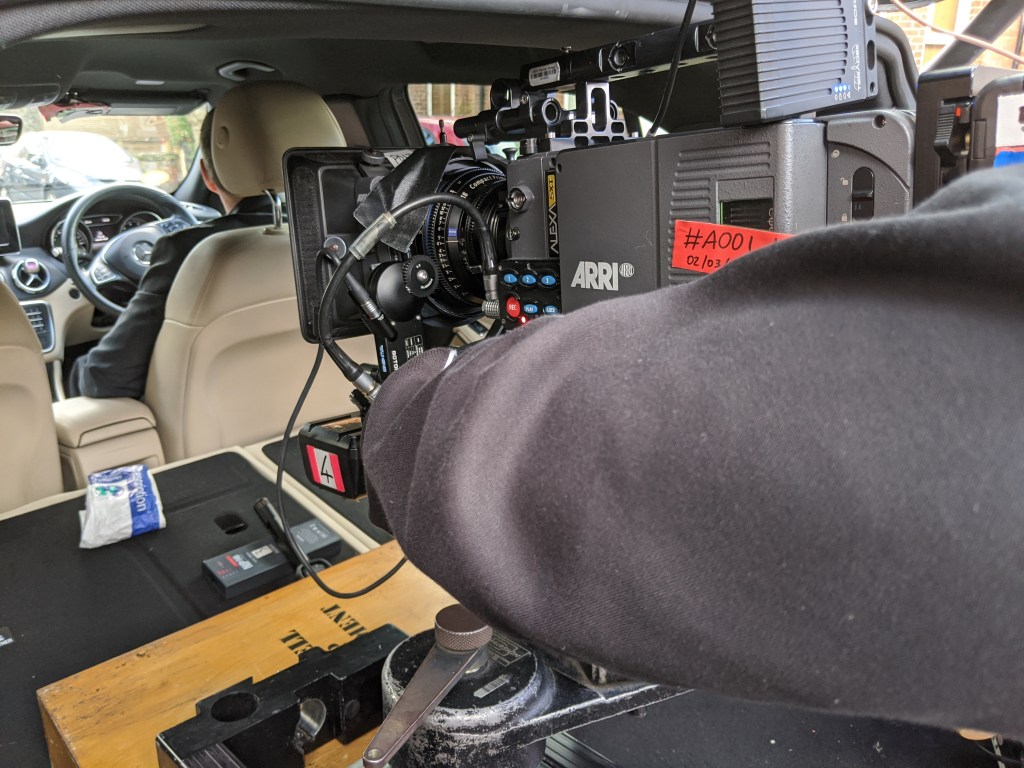
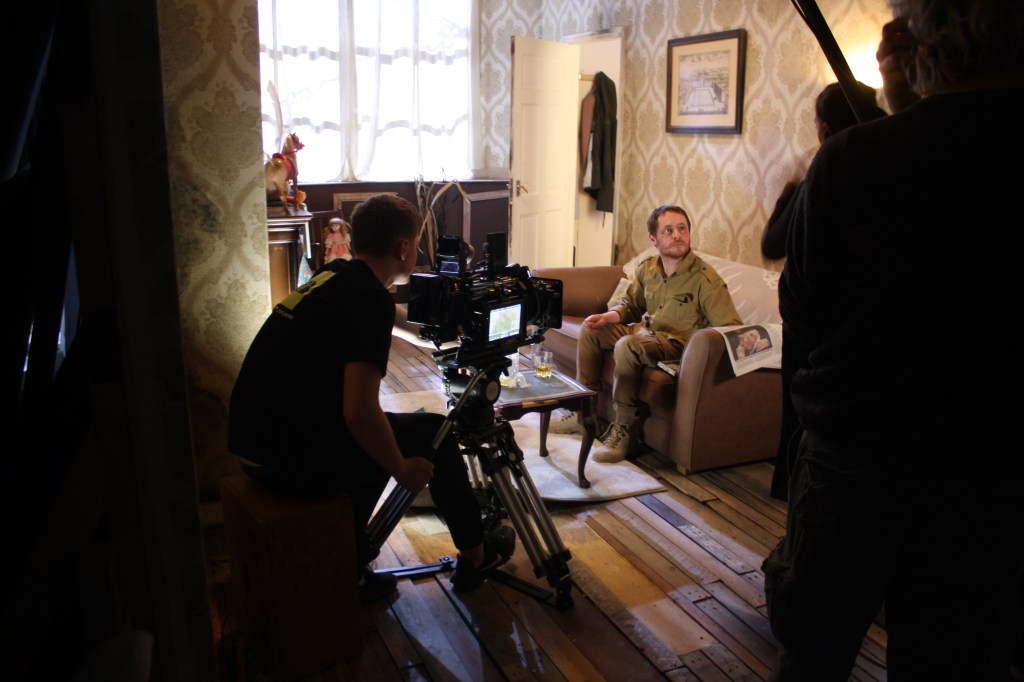
Forget Me Not is a story about an old lady named Rose who suffers from Dementia. Her daughter Karen and her husband Geoff are carers for rose as she will not allow anyone from a hospital come near her. Karen is a nurse so the only way of getting near rose is by removing her work clothes before entry upon the house. Karen tries to relive the good old days with her mother through pictures but Rose remembers nothing. Is this too much for Karen to take…
The Cameras…
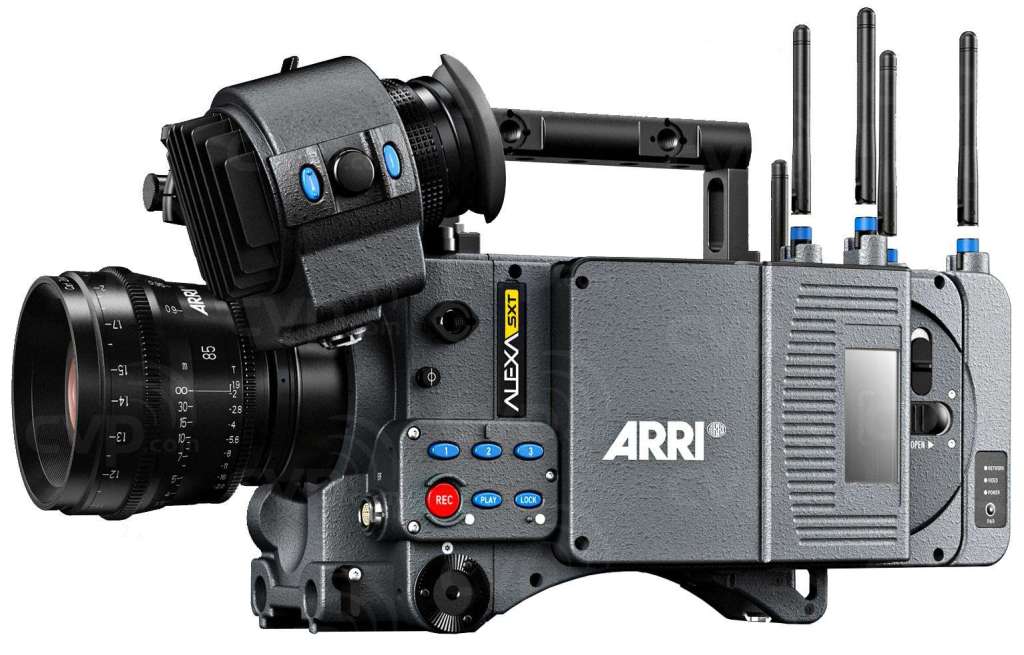
– ARRI ALEXA SXT (ARRI 2017)
Body of an Alexa SXT
Official ARRI Logo
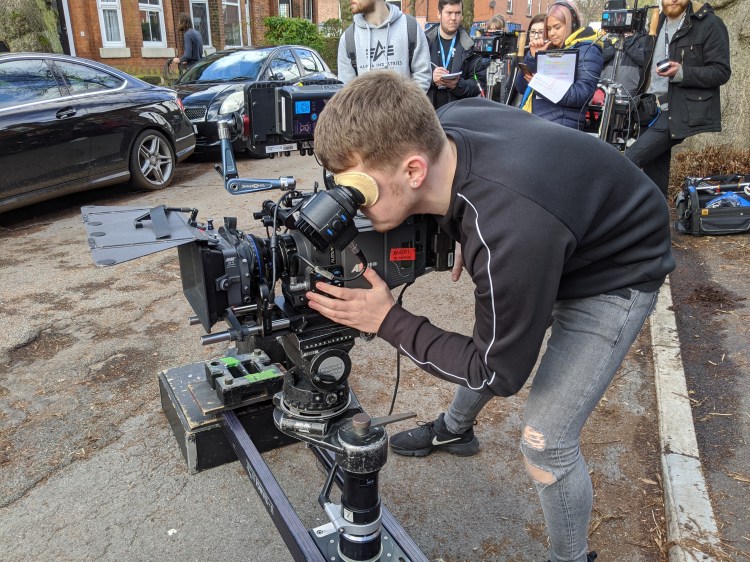
For this shoot we were lucky enough to have been rented x2 ARRI Alexa SXT cameras from ARRI Rentals (ARRI, 2020). This was the first time I had properly used an ARRI camera on a production. Prior to this I had rigged, but not used one to this extent.
A week before the shoot , we decided to have a mini workshop followed by test/prep day, so that everyone was familiar with the equipment(P9 NOS). To some people, including myself, having to learn menus on a camera is something which can be tricky to get your head around. The workshop allowed us to play around with its menus, to find out where everything is on the camera, and I was shocked with how simple the Arri’s menus actually are.
Compared to Sony, the Arri’s menus are layed out on one big screen on the side of the camera, and is very easy to get your head around. Everything is more of less labelled above its buttons which gives it such an easy understanding.
An example…
In the menus on a Sony camera, it is more difficult to adjust settings such as ISO’s and Colour Temperatures. To amend these settings you access one menu within another The process can be time consuming, and very technical. Whereas compared to the Arri, the information is all in one place for you to make quick amendments to, without getting lost in its menus.
Sony FS7 ISO Change…
As you can see in the video below, changing something as little as the ISO on a Sony camera, can be very tricky to understand, as is it necessary to go into multiple settings on the camera in order to access certain menus you wish to adjust. (Youtube, 2016)
ARRI SXT ISO Change…
In this short video, you can see just how simple it is to change an ISO settings on an Arri camera. As well as the Sony, an Arri allows you to have pre-set ISO’s to flick between, but changing the values of these on a Sony is extremely long and confusing. On the Arri, it is made so simple and easier to change.
NOTE: The camera in the video is an ARRI Amira. However its menu display is the same as an SXTmodel. (YouTube, 2016)
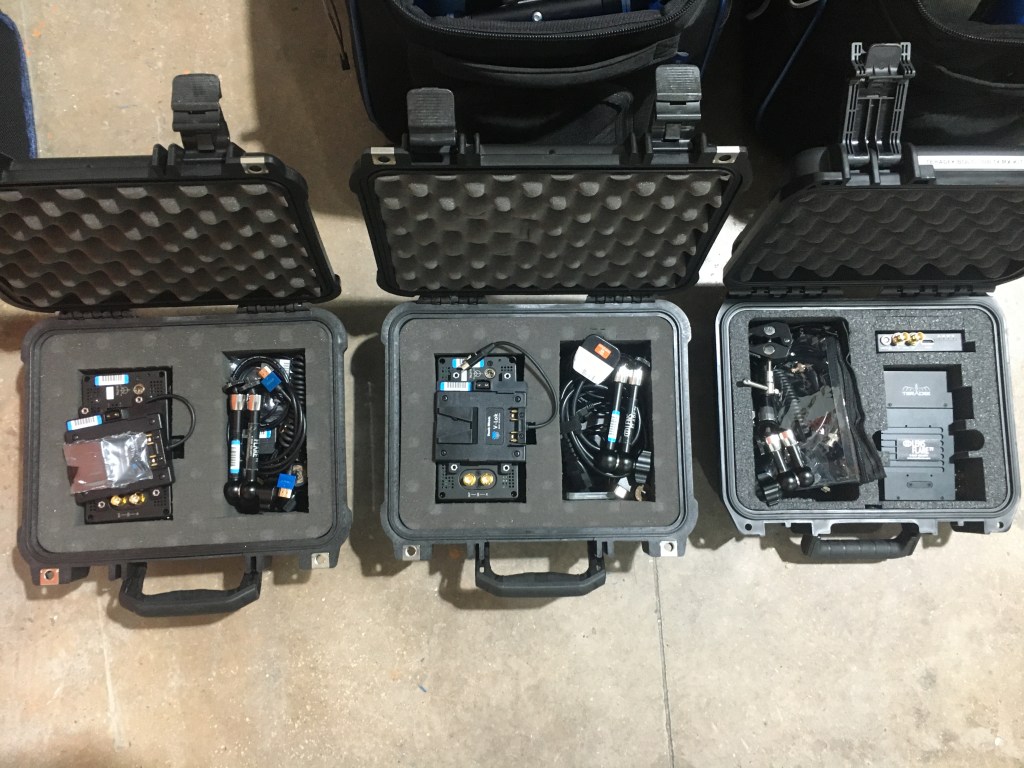
When the cameras arrived, documentation was included, containing information of the contents in the boxes and where they should be stored. To make sure that everything they say should been in the boxes we decided to go through each of them and lay out its contents, ticking off everything that was included in the cases (P8 NOS). This was the best way of looking after the equipment, as they were rented and we did not want to lose/misplace anything which could result in further connections being damaged between the film school and Arri. We made sure that we kept A Cams package separate to B Cam to prevent contents being mixed up with between the two.
To make sure that the cases were safe and that they could not get damaged, when loading the van, we made sure that all rented equipment was placed to one side; keeping it safe and protecting it from being damaged by other equipment in the van. Upon arrival to location, the camera teams made sure that the cases with the SXT equipment in were handled with extra care, and two people to each box was the way we went about this (P17 NOS). The cameras were off loaded safe and damage free.
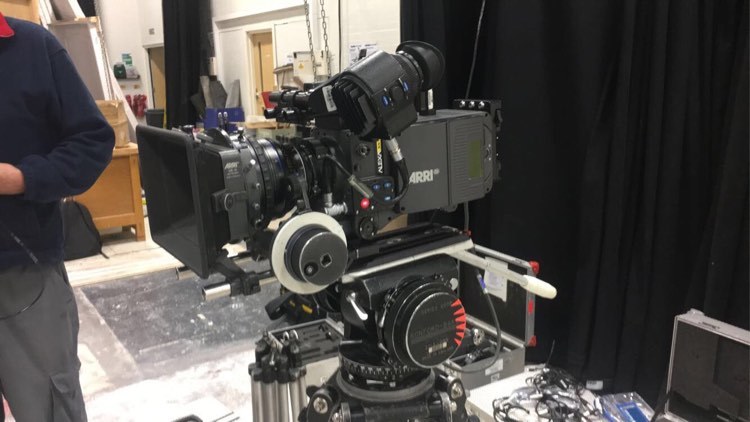
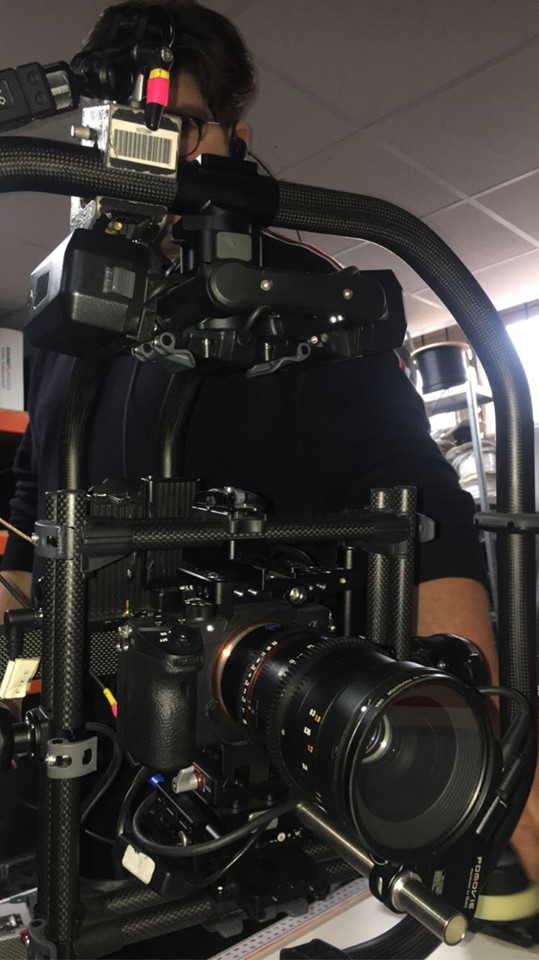
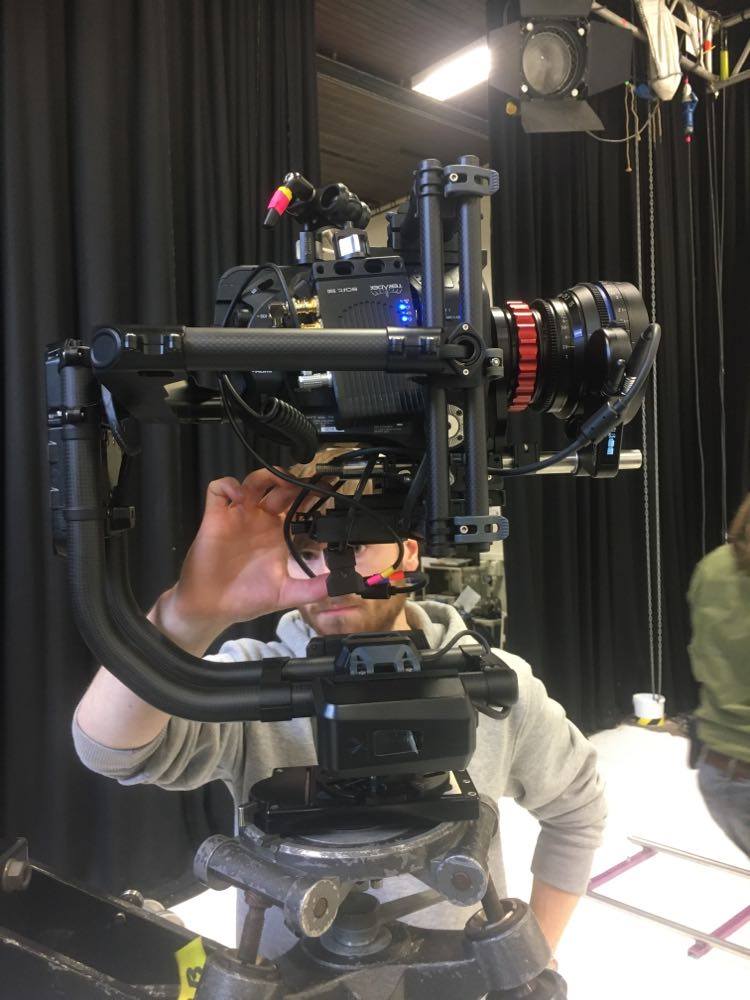
The 360′ Shot…
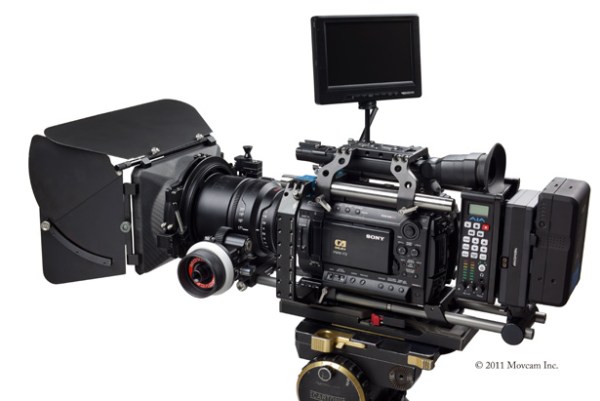
Fully Rigged Sony FS7 MkII
For one of the scenes towards the end of the film, director Simone Walsh, wanted to capture a slow dance between Karen and Rose through a 360 degree shot which would be cut up into a montage of images between the pair. Before the shoot we decided to do a test of this shot (P8 NOS) to ensure that the correct equipment was being used for the type of shot it was. We needed to make sure that because we were using the Movi Pro (Freefly, 2020) that we had the lightest equipment attached to the gimbal. The lighter the rig, the easier it would be for me to operate. The Sony FS7 (Sony, N.D.) was the camera we decided to go with as it could be stripped down to just its body and attached to the Movi.
On the day of the shoot with the actors in place we were able to do a rehearsal of the dance, so that I could master the shot and capture it how Simone had planned in her head. I had to make sure that I hit every position in the room, so that I was maintaining my framing with both actors in shot. After a few times rehearsing and shooting multiple takes, we eventually got the shot, and was able to move onto the last few of the day. Take 4 was the best take.
The Test…
This was the only example I could find of the test we done for the 360 shot in Forget Me Not. As you can see from the video, both stand ins were centre frame throughout the entire shot. This is what we were aiming for on the day of the shoot. (Youtube, 2020)
The Take…
You can see a very similar comparison from the test footage and the actual footage we captured on the day. I was able to get the shot which I had practiced multiple times in the test exactly how we planned it. (Youtube, 2020)
Testimonials…
Simone Walsh- Director
I have worked with Lewis on a number of shoots now and all I have is praise for him. He has exceeded my expectations every time and I was extremely happy that he was the main operator on Forget Me Not as I trust him to do a fantastic job. There were a number of shots that were combined and a 360 shot that we put in and I never for a second doubted his ability to get these shots. I am confident that the film is going to turn out amazing and a huge part of that is down to Lewis and capturing what we wanted from the scene. He has excellent communication skills and there was always open dialogue between myself, him and the DOP which was an integral part of making the film work due to the complexity of some of the shots. He had a great rapport with his camera team which was also evident throughout the shoot. There isn’t a doubt in my mind that one day he will be a great camera man in the industry and hope that he will continue to work on my projects. – Simone Walsh
Ben Eckersall- Director of Photography (Instagram, N.D)
Lewis went above and beyond as the operator on ‘Forget Me Not’. Consistently being able to pull off a number of technically difficult shots not only improved the quality of the film but also helped us stay on schedule. I would definitely turn to Lewis for any operating roles in the future and would be more than happy to work with him again.
Sony v ARRI…
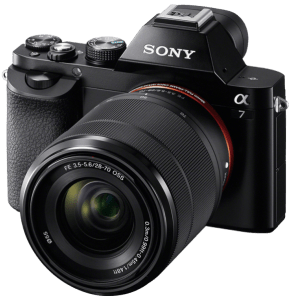
Official SONY Logo
Official ARRI Logo
There are many people who have mixed opinions about weather or not one company is better than the other and which cameras stands out more. Lets look at why they have a preference and delve in deeper.
Why a preference…
Having been on shoots whereby kit we have used has been Sony, it is easy for me to say that I prefer using Sony cameras over Arri’s. However, this is not a good enough reason for why I should make this preference, as from a technical aspect, Arri’s are known for being the camera to go with. Many well known movies tend to use ARRI over Sony and there must be a reason why. This section of research will give me a better understanding on why some production companies chosen one rental over another and will display primary research from myself of the big question, Sony or ARRI?
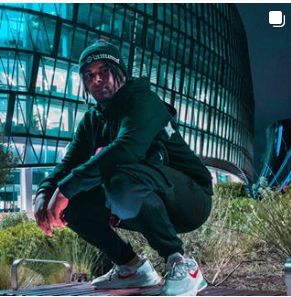
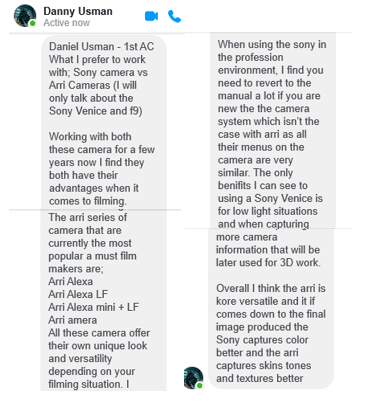
Danny Usman– 1st AC(Instagram, N.D.)
Danny Usman, is a ex graduate from The Manchester Film School who since leaving has worked on many exciting projects as a 1st & 2nd AC, working on music videos featuring the likes of British artists, Ed Sheeran (IMDB, N.D) & Stormzy (IMDB, N.D) on their music video “Take Me Back To London” (YouTube, 2019).
I recently got in tough with Danny to ask for his opinion on weather or not he preffered using a Sony or an ARRI. His reply was,
Private message sent to me from Danny via Messenger
His reply is quite open as he gives different reasons for the two companies. It seems to me that his knowledge for Arri is strong and that these cameras are where his comfort is when it comes to filming. He gives some valid points regarding certain lighting situations for the Sony and explains in an overall statement at the bottom that the two cameras have their own advantages and disadvantages in comparison to one another.
Rob Hardy- Filmmaker (Vimeo, N.D)
Up and coming Filmmaker, Cinematographer and Musician, Rob Hardy, explains in an online article his reasons why “ARRI cameras are so popular with professional cinematographers”. Written on ‘Nofilmschool.com’, speaking about the Arri Alexa (ARRI, N.D.), he says;
“When you combine the fact that the Alexa is dead simple to learn and operate, with the fact that these cameras are built like tanks and steadfastly reliable… it’s no wonder why people return to the Alexa time and time again.” (Nofilmschool, 2015)
He goes on to speak about the video shown below, released by ARRI. (Youtube, 2015). (APPENDIX 6)
To sum up Roberts thoughts (APPENDIX 6), it is clear that he is a fan of ARRI and believes that the quality of image captured from them, is better than no other. He makes a valid point about how companies always seem to go back to an Alexa for their productions, as well as telling us just how well build an Arri camera actually is.
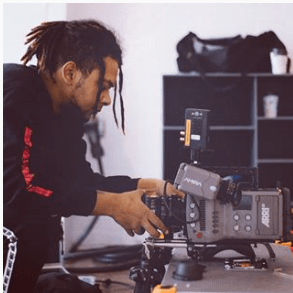
Rico Bam (IMDB, 2019)
Rico Bam, is a freelance AC who has a very impressive knowledge regarding his role and cameras. He has worked on many productions in the UK (IMDB, 2019) and over time has collected a foundation of knowledge regarding cameras and what the different brands of cameras can do. He is able to tell me fine details of different cameras such as an ARRI or a RED, explaining specific details I have never seen anyone display before.
After working with him on a small project a couple years ago, I was able to see just how impressive he actually is as an AC, in which I Loaded and he Focus Pulled. Recently , I got back in touch with him to ask for his opinion regarding a Sony and an ARRI, and lets just say I can take a lot of very useful information from his message and use it for myself for future shoots I work on. This was his very defined message
Arri is an amazing camera. The design and functionality of the Alexa range and Mini cameras were put together when arri invites long time operators in the field to help them come up with things that would be practical and useful. Relying on the first hand experience of people that use it as a tool everyday. The result was a range of camera fit for various types of filming. The older style Arri’s are heavy cameras but once you have it on your shoulder it’s remarkably well balance and a lot more comfortable then I expected. The menu option is functional, intuitive and simple and to the point. It’s also been an on going process and with newer camera they have listen to feedback from users and they continue to try and make things better. Simple things like where to put a power ports and how to connect the eyepiece to the camera. Figure out what break the most frequent and how they can re-work it to be more sturdy or less prone to braking.
Most of my experience on Arri has been the Alexa classic and Arri Mini. they are in my opinion absolute work horses in the TV drama world running 12hrs a day 5 to 6 days a week and it works every time. TV drama shoot can sometimes be in a lot of different weather condition and location with dust and humidity. And with a good camera assisting team the helps look after the gear it keeps performing well. Specially the mini. What a little trooper. It does not early overheat like the Reds do. It very rarely have issue with dropped frames. Even the ProRes compressions is enough to make it affordable for smaller productions to get a high quality image without needing massive amount of data storage capacities. Now when it comes to sensors it has a good dynamic range and and really good in relative low light.. I once worked on a film where the DOP light 60% of the scenes by candle light and a few soft practical. And the min managed to capture remarkable detail at 800 EI. Now I know that Arri sensors ten to have a stronger green hue that it picks up, especially where a sensor has had a high number of hours clocked up it could be more evident. But as a general rule it as a really good skin tone representation. DOP’s in the TV drama world love them for all these reasons.
Now with all this said.. Sony cameras… I am not a fan really but that probably cause I always associate them with still cameras. I have worked with the Sony F55 a few times and I just do not like them. They have silly things like an almost unworkable menu system.. and extreme tricky system to make it shoot in a raw format. You have to shoot in raw to get anything good quality enough to compare to the likes of what (in my opinion) the Alexa Mini will give you.. one of my pet hates is the on/off button that sits right next to where the operator’s face goes.. we actually had to put some tape over it so the operator did not accidentally turn it off mid take. Just not a camera I enjoy working on. But I believe they are good cameras for run and fun shooting stuff, but personally I think one big factor is the cost as run and gun self shooters probably can’t afford an Arri from the onset. Even renting it from a rental house, the F55 is cheaper so low budget productions and run and fun shoots would choose this due to budget constraints.
The only other Sony I have worked on is the Sony Venice… now this bad boy is probably my favourite camera at the minute. Or at least in line with the Arri Mini for me.. but really I would probably choose the a Venice if I had to choose. Sony Venice is one of those game changes.. it’s not perfect by any means and some aspect like compatibility with some of the extra bits you slap on the camera it turns into a heavy lumpy thing compare to the mini that has some of the bits built in to the body.. but those trade offs you can live with when it comes to using the functionalities on the body, the two native EI’s and the sensor. The picture you get from it is just so beautiful. Some people say it’s a bit to digital. And it is digital, I agree.. not as digital as a red in my opinion, but still digital and clean. But it’s like looking at a sheep and saying.. it looks more like a sheep then a goat. Well in my opinion if you want a sheep to look like a goat you better off finding a goat to look at. Lol. I always want to see what a few vintage lenses would look like on a Venice. Maybe it will loose some of that digital clean crisp lines. But then again it’s really an artist choice to compliment a story.
So if you want you can have a look at the nexflix show called “The Stranger”. That was shot in Venice with some anamorphic lenses… and also the show on BBC 2 called “Giri/Haji”. That as shot on the Venice with new Leica lenses (they are more cleaner lenses). But yeh I always come back to the performance in low light and the colour representation. It always blows my mind. Specially Gari/Haji where they shot scenes in Tokyo at night using just the neon street lights and a bit of bounce and the images was still well balance in detail and colour representation. They also took a leave out of the Arri book when they designed some of the function buttons so you can bypass the stupid Sony menu system to get access to some functions instantly and with one or two clicks.
Rico Bam. Assistant Camera
Sony a7S II vs ARRI Alexa Mini…
Sony a7S II vs
ARRI Alexa Mini
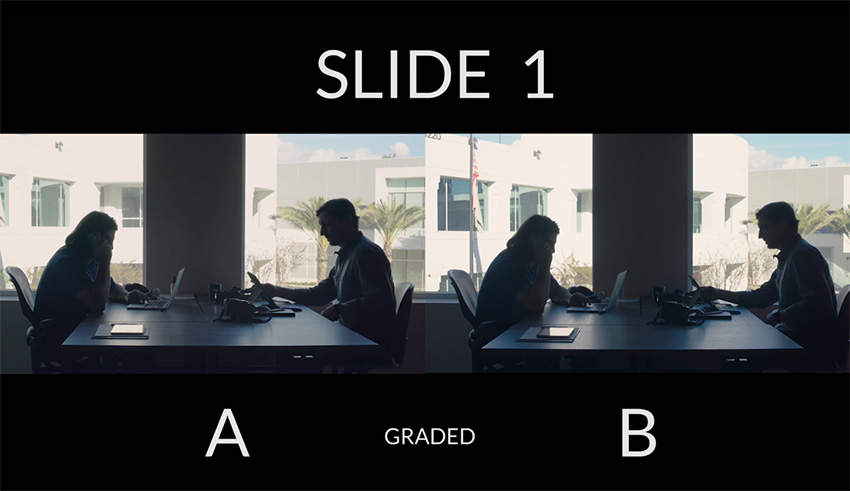
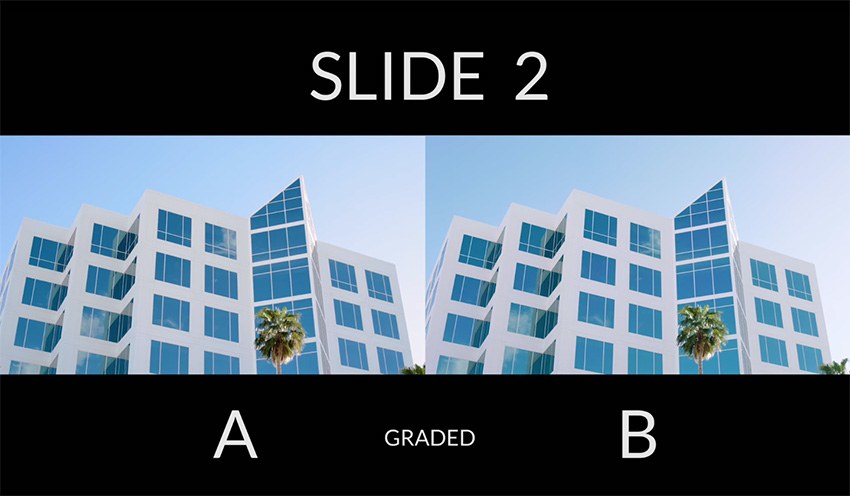
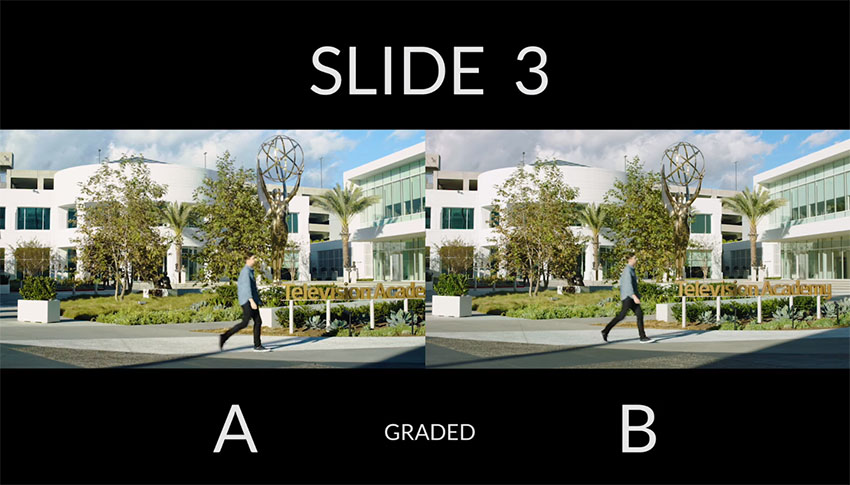
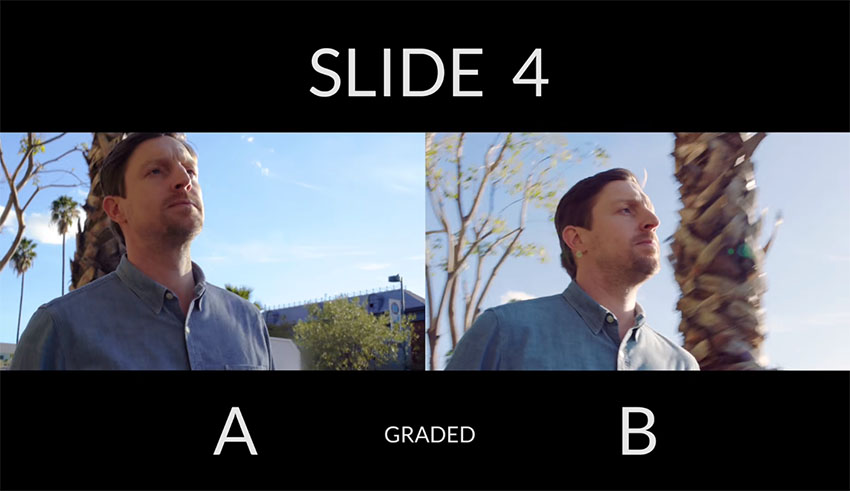
A video created by ShareGrid (YouTube, 2018), an American rental company/ YouTube channel, shows us the difference between a Sony a7S II and an ARRI Alexa Mini. They give a brief detail into what each of the cameras can do and show the difference in picture, though test shots of the pair. They make it clear that the difference between a £2000 Sony and £50,000 ARRI, technically, has not much difference from one another, only an Arri is the more popular due to its well built body and renowned reputation.
An example from the video showing so little differences between the two cameras, in different lighting situations are shown below (4K Shooters, 2018). Depending on the lighting, you may or not see a difference in the examples. See (APPENDIX 7) for more detail
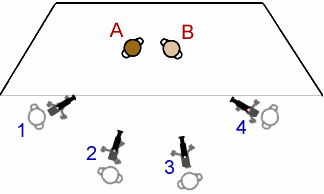
A= Sony a7S II, B= Arri Alexa Mini
As you can see from slides 1 and 2, the image looks very similar and the colours are almost the same. Compared to slides 3 and 4, when the lighting situation changes. The cameras begin to show a difference in picture with the ARRI keeping more natural looking skin tones and the Sony showing slightly more brighter, bolder colours. (APPENDIX 7)
-P8 ensure that appropriate camera testing has been carried out
Knowledge and Understanding-
-K11 how to determine the appropriate testing techniques
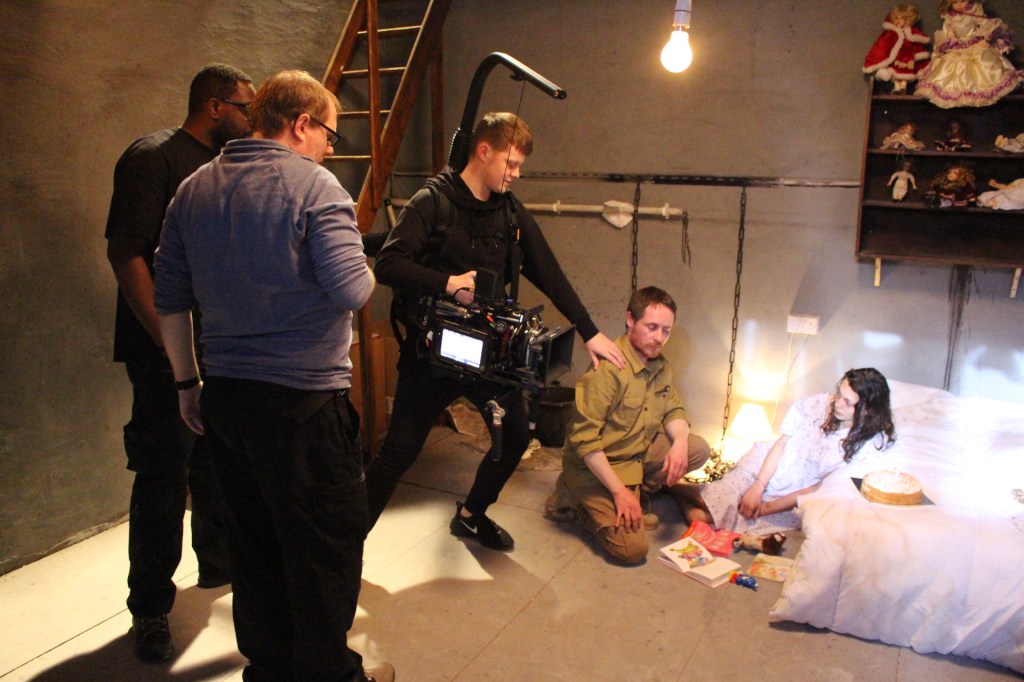
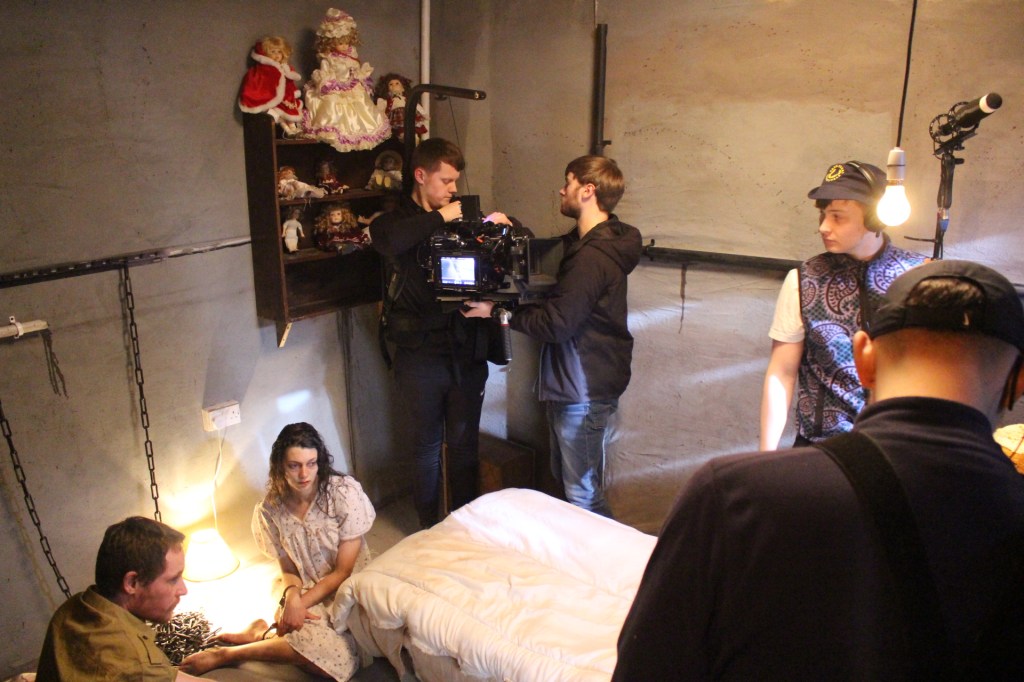
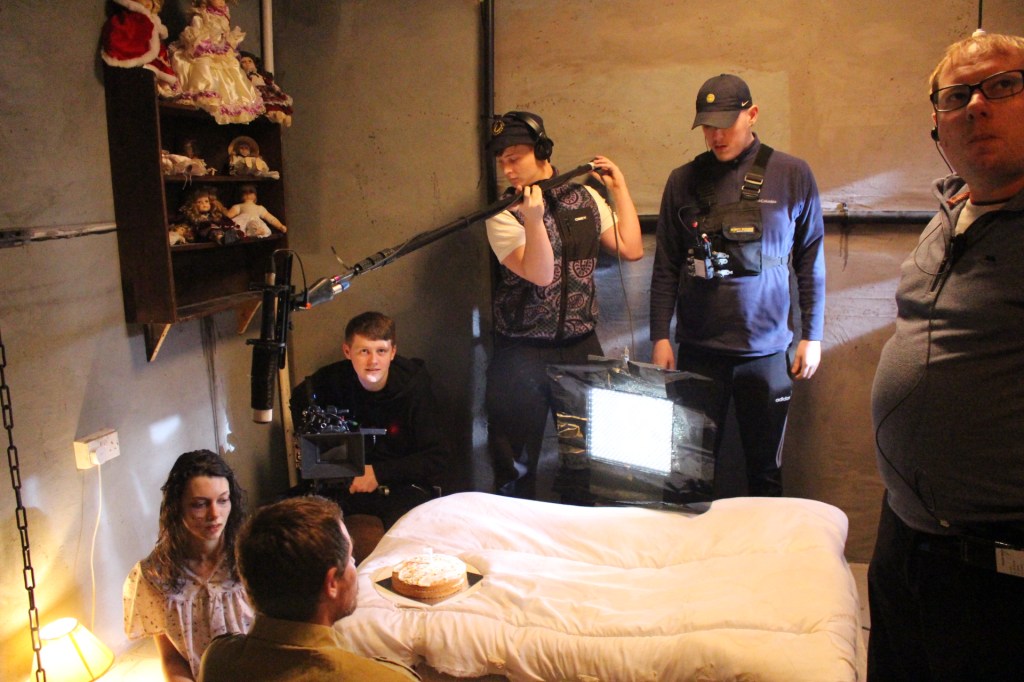
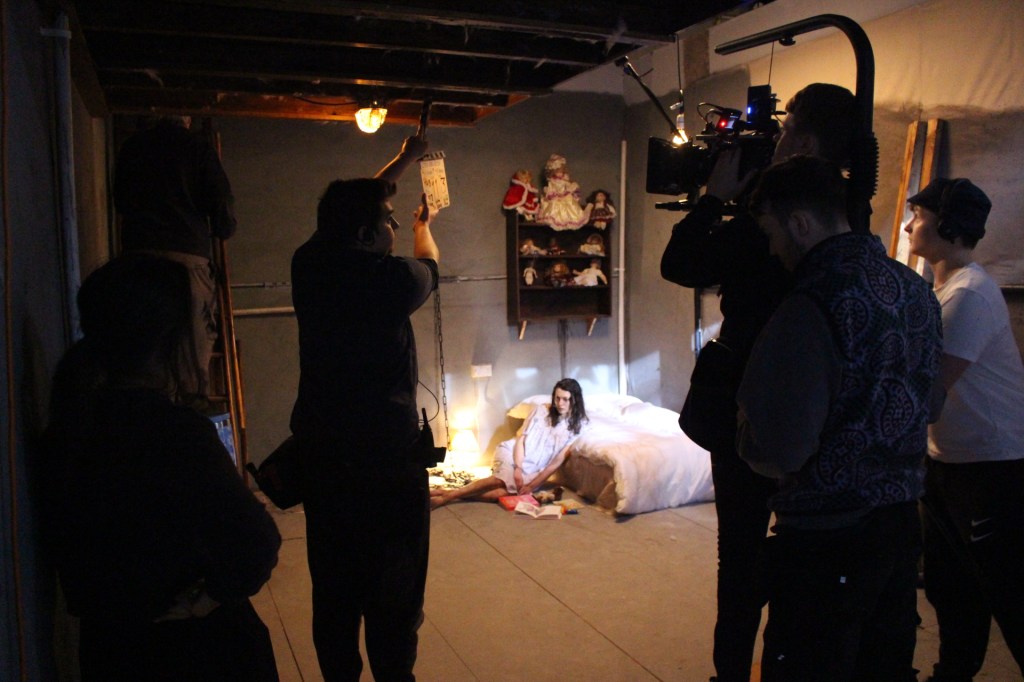
Little Girl Eliza is about a man who is grieving from the death of his daughter and in order to get over the realisation of this news he takes it upon himself to kidnap a young girl who he can now call Eliza. He is a man who is clearly lost and needs help, but takes to committing thing this awful offence to make himself feel better about the situation he is in.
Testing the Tracking shot
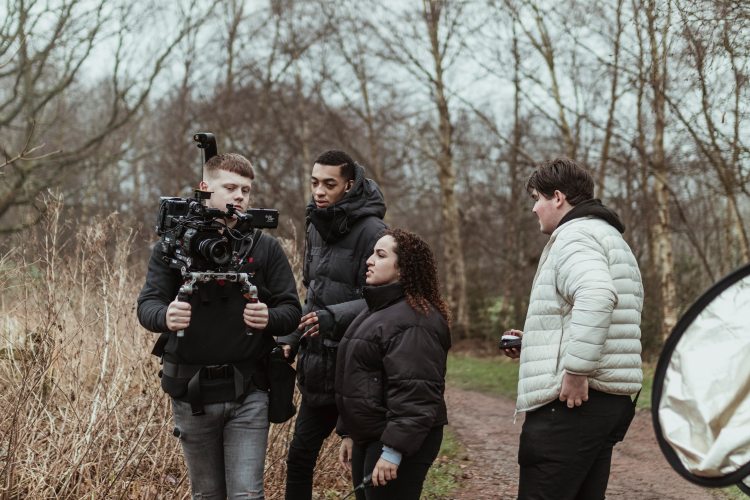
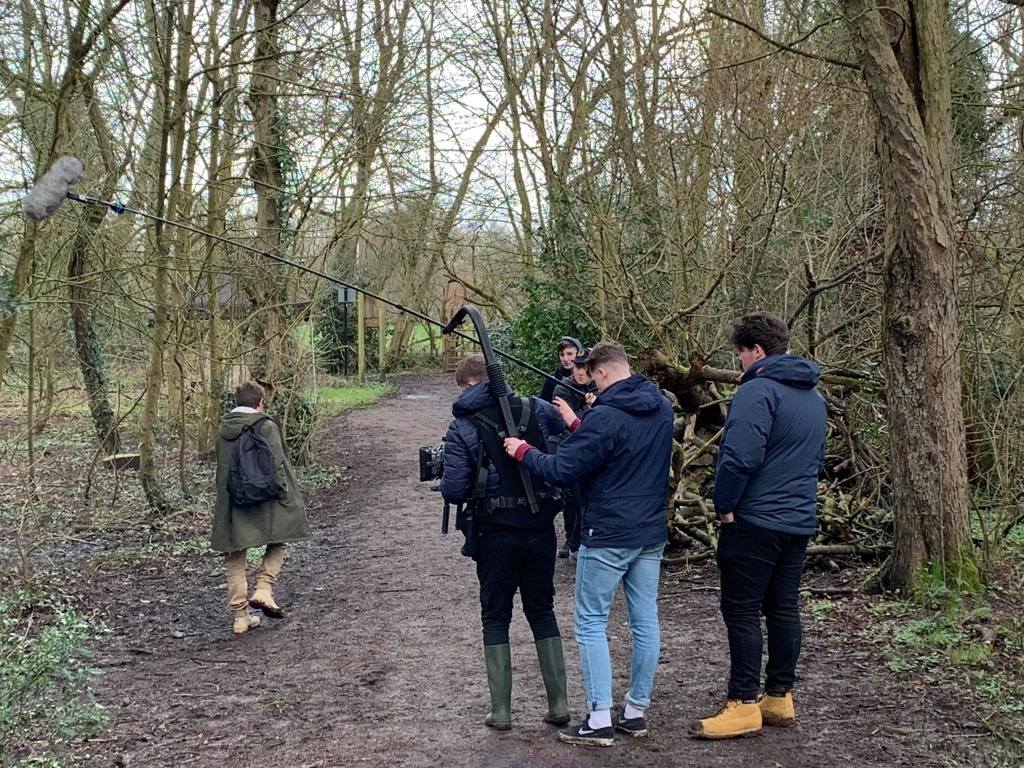
Rob the DoP, wanted to do a tracking shot where we follow the actor, Owen, through the forest as he is on his way to the cemetery. This was going to be a tricky shot, as being out in the forest attempting to follow the talent over rocks and tree branches can be very difficult and potentially dangerous.
We decided to do a full test for this shot (P8 NOS), and on the day, Rob decided that I should test the shot with the camera facing behind me as this would have allowed me to walk forwards, which he believed would have been easier than attempting to track back; not knowing where I am walking into.
We attempted to do the test both with and without an easy rig; using a handheld kit as the other option. After attempting Robs suggestion ,I wasn’t confident in getting the shot exactly how he wanted it. As the camera is facing backwards, everything was switched around, so when I panned LEFT, the image would go RIGHT. I found this confusing, and had we shot it this way, I could have potentially tripped which would have resulted in serious injuries. (Youtube, 2020)
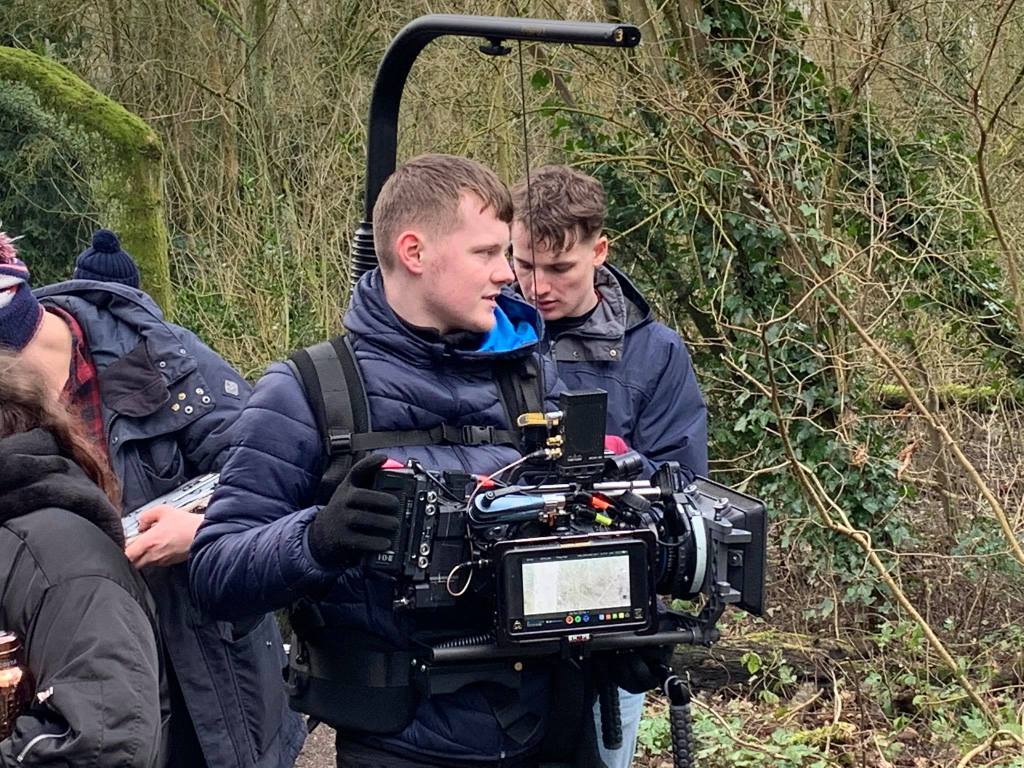
Once we tested the first technique, we rigged the camera back to its original position facing forwards, and attempted it this way to determine which of the two was the best option for me (K11 NOS). The camera facing forwards was the best option for me, as I had full control over the shot and the whereabouts of my framing. I decided that hand held bars was also the best option, rather than the Easy Rig, as this would allow less pressure on my back which meant bending down and moving left to right was easier for me to do.
The Results
The test had worked to my advantage as on the day the conditions in the forest were exactly as I had described: rocky and full of tree branches. I was prepared for my movement, as I had practiced it over and over again during test day.
In the results, there I also another shot I have included of Owen still walking through the woods. However, this was a different type of shot. It was a side on profile shot where in this case I decided to use an Easy Rig for smoothness and speed to crab right; following him as he walked through the deserted woodland with the trees and branches showing in the foreground to create a better effect (adding more quality to the shot). (Youtube, 2020)
Hand HeldOperating
Hand Held operating is one of my favourite ways of operating, as it enables you to be more creative with your shots. You are able to move the camera into many different positions when the camera is in your hands, rather than when it mounted on sticks. There have been many times throughout my time at the film school where I have been required to operate hand held, and I believe that I have improved over time. I feel like the reason Rob trusted me to go hand held on this shoot was due to his experience on set with me where I have operated this way. He has witnessed what I can do when put into a hand held situation.
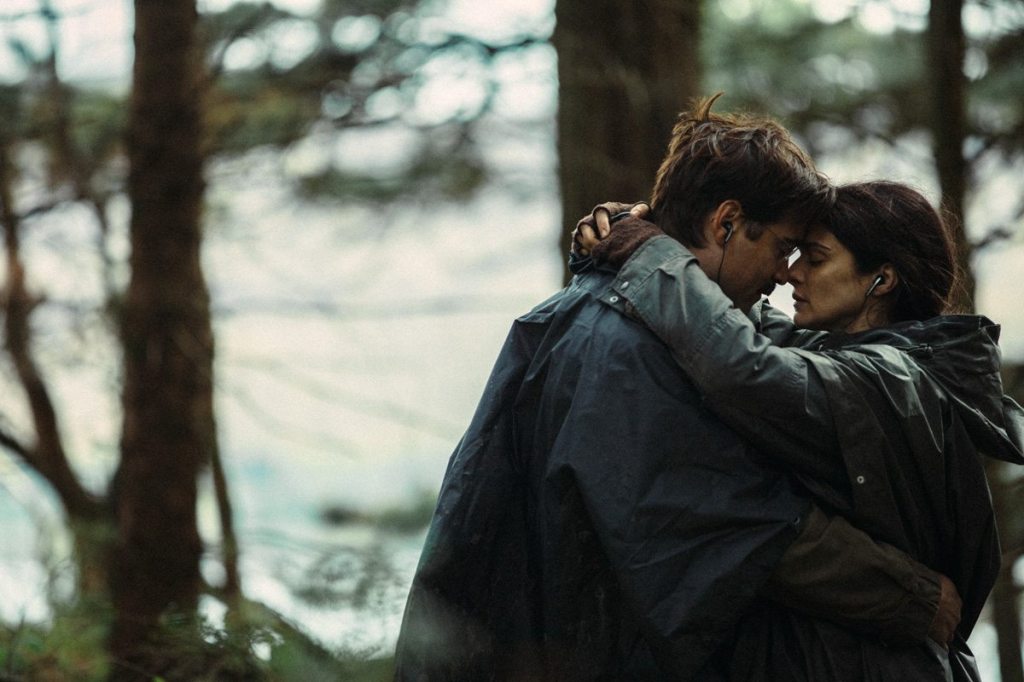
Thimios Bakatakis
Thimios on the RIGHT
Greek Cinematographer, Thimios Bakatakis (IMDB, N.D) who DoP’d the film ‘The Lobster’ starring Colin Farrell and Olivia Coleman, provides a good quote linked to a hand held situation that he had worked on in a previous movie. Speaking about the film “Kinetta” in an article written to the British Cinematographer.com he says:
“In Kinetta everything was hand-held, so that the camera had a role in the film…Dogtooth was more static and formal, with the camera closer to the actor.”(BC, 2015)
This is the first time I have seen a sentence like this regarding the “role” of a camera. By this, he means that the camera is showing a purpose as it allows the operator to use it in this certain way. This statement shows that Thimios has a clear appreciation for cameras in his movies. By going hand held, you are using the camera to its full potential, as you are manoeuvring into almost any potition possible.
CAM OP NOS- CTV2 Set camera menus for portable single camera (PSC) operation
Performance Statements-
-P6 identify, select and correctly adjust the settings on the selected camera menu or sub-menu pages for the required output
DOP NOS- C2 Specify camera equipment required
Performance Statements-
-P2 select equipment which allows for production flexibility and probable back-up requirements within budgetary limits
Knowledge and Understanding-
-K12 the types of experiments during testing which may enhance the agreed visual style and brief
Not Trending, is a Youtube chat show hosted by Jack Barlow, a fellow 3rd year student. In this episode of the show, we interview UK rapper Fabio Ali (Instagram, N.D), to find out more about him as to where he began rapping and how it all came about.
(Youtube, 2019)
Having known Jack for the last 13 years, he has always been into YouTube, and has wanted to do something like this for a very long time. He pitched his idea, and was granted permission to shoot it as a major. This was the first time I had worked on a shoot like this: it being a chat show rather than a short film. I decided to Op/DOP, as my intention was than Operate more than anything. Jack left me in charge of putting together the materials that I might need for the camera department, and to come up with different ideas for shots we could create.
I decided to have a three camera set up; not only to capture all angles, but to save time than if we were to use only one, maybe two cameras and move them around to the different positions. We used;
Sony FS7 (Sony FS7 PDF, 2014)
Sony FS700 (Sony FS700 PDF, 2012)
Sony F3 (Sony F3 PDF, 2011)
As we were using three different cameras, we had to make sure that all settings were matched, so that the footage would look similar (P6 NOS). We had difficulty with the FS700 as the image looked different from the other two cameras. Our ISO was set to 2000; we had a 180′ Shutter Angle and a White Balance of 3200k, but for some reason the image was different and no one could think why.
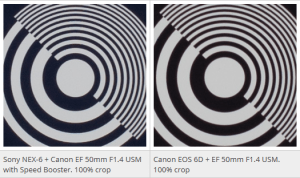
After a while of playing around with the camera menus to try and solve the issue, Freddie realised that on the FS700, we had put a Speed Booster onto the lens.
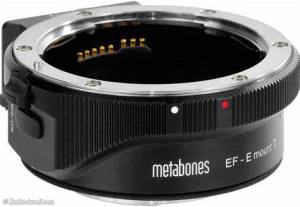
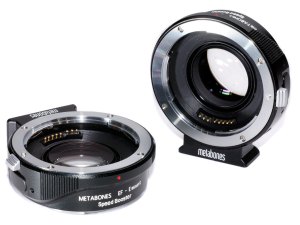
Speed Booster
Sony E-mount Metabones Adapter
A Speed Booster is used to attach to the body of the camera in which the lens gets fitted to and adjusts your image. They are known for making our lenses wider, allowing more of an effect to be had with our range of Aperture. The speed booster which we used was a Sony E-Mount Metabones adapter (Metabones, N.D) and in a section on their website explaining exactly what they do, it says;
“Mounted between a mirrorless camera and a SLR lens, Speed Booster® increases maximum aperture (hence its name), increases MTF and makes lens wider.” (Metabones, N.D)
An article online at DP Review.com explains in further detail what a Speed Booster is and how it effects your image. Describing what Metabones say about their speed boosters, they say;
“Metabones claims that by reducing the image magnification, the Speed Booster gives an overall focal length multiplier of around 1.09x, promising a nearly full frame field of view on APS-C.” (DP Review, 2013) (APPENDIX 10)
When looking at both images, one can see that the picture on the left (with speed booster)has a sharp centre point the same as the image on the right. However, with the attachment, it begins to soften out the edges of frame as you can see from all four corners.
Phillip Holland…
Phil Holland (IMDB, N.D) is an American Visual Effects/ Cinematographer who has worked on movies such as X-men and Iron Man. In a discussion at Cinematography Mailing List.com, about speed boosters, Phil responds to questions and gives his view on the actual outcome from a speed booster. In a positive light he says:
“Speedboosters/Focal Reducers are an empowering tool that allows for larger format glass to cover smaller format sensors with the benefit added light gathering ability.” (CML, 2018)
But this statement was shortly followed with his real opinion on the attachment, and he explains a few negatives regarding the effect they can have to an image.
“They are very cool and useful, but not the cure all for all things. You’re still tampering a bit with the look of your glass and for the discerning DP you see that pretty damn quickly.” (CML, 2018)
He warns people of a few negatives, these are; added Distortion, increasing change of vignetting, Chromatic Abberations and subtle bokeh character differences. These are some of the things you need to think about when using a speed booster and having an understanding of what they are is key.
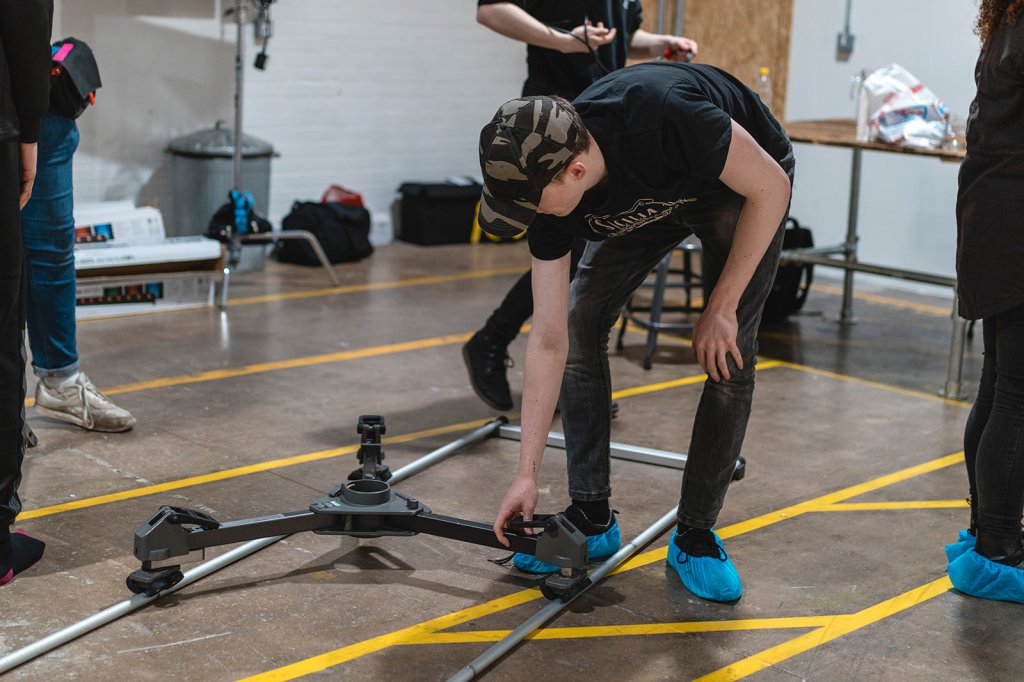
Back to the shoot- Being Flexible
With the shots being basic from both left and right side cameras, we did not need a focus puller which meant that both Alex and Freddie would op and focus pull to any movements. I let them chose their camera package, and got it all booked out. On the day of the test it turned out that there was also another test/shoot happening on the other side of the studio, and to our disadvantage, some equipment which we booked out was being used by that crew.
When an issue like this happens, the best thing to do is to be flexible(P2 NOS) and to work with what you have available. You should not get aggressive or bad tempered because there is always a solution to a problem. Our main test was the wide shot of both actors, which we chose to use the FS7. However, with our equipment issue I rigged a Cannon 700D to a head and placed it onto the flat bed as we were still able to use the lenses we booked out (Samyangs) (K12 NOS). This would give us a very similar image to what the actual shot would have looked like had it been shot on the FS7; allowing us to still test the shot.
Shooting for a YouTube project – Multi Cam Setup
As explained earlier in this section of the report, this was my first time shooting something for a YouTube channel, which I knew was going to be tricky. I decided to look into reasons on why a multi camera set up is the best way to go about filming for something such as a YouTube project.
GloCast (GloCast, N.D)
GloCast are a live event and video professional company who talk about the benefits of using a multi camera set up, and why they do this for their event based projects. They say a multi camera set up makes your film look more “dynamic and interesting” followed by “the more cameras we can use- the better your film will be“. I agree with this statement, as the more angles you cover, the better the final image will be.
They say that by using a 2 camera set up, you are able to lock off your wide and can allow the operator to be mobile in getting any other angles of the scene.
When describing a 3 camera set up, they say that the locked off wide is used as a safety incase the other two cameras aren’t able to capture a reasonable amount of footage. It may be too zoomed or out of focus.(APPENDIX 10A)
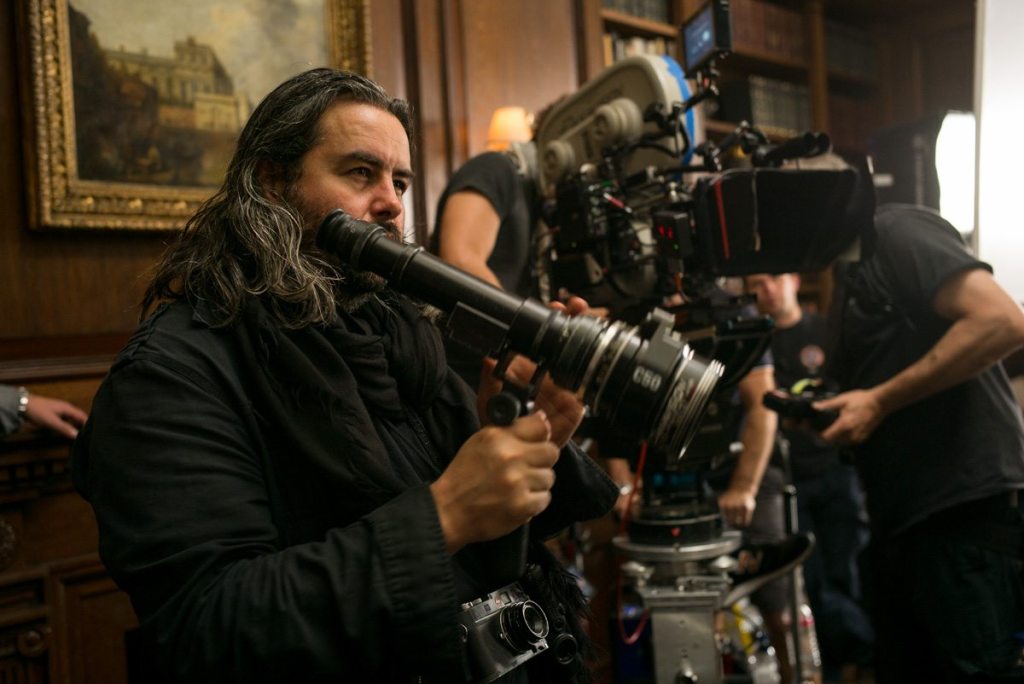
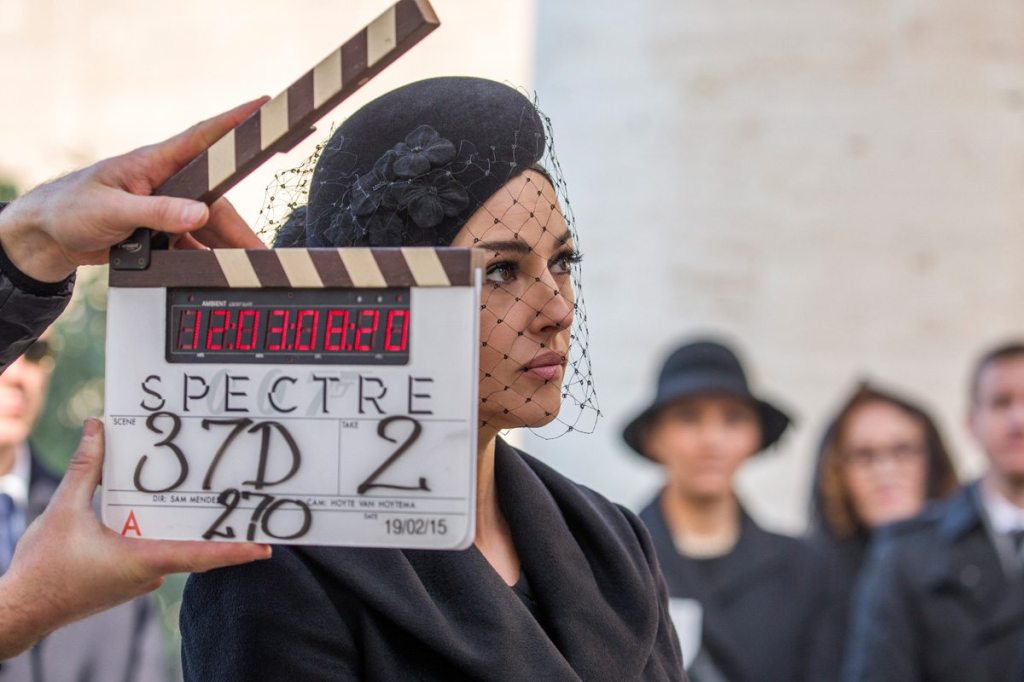
Hoyte Van Hoytema(IMDB, N.D)
Cinematographer, Hoyte Van Hoytema is best known for working on films such as Spectre and Dunkirk. In an artile written inside a British Cinematographer Magazine, Hoyte answers questions about when he worked on Spectre, and breaks down each part of his role to explain what he did and how he done it. In a section talking about how he moved the cameras, he explains why the movie was mainly shot on just one camera. He says:
“SPECTRE was mainly a one-camera shoot, especially for dramatic conversation pieces. I like the camera to move in a functional way, with a certain integrity and decency, unmotivated and never for the sake of it.” (BC, 2015)
I agree with Hoyte, as I have been on shoots where actors are performing very emotional, deep scenes, and the best way for this is to have just one camera. You want them to perform to their full potential, and a multi camera set up at times can be off-putting. Actors can sometimes worry about whether or not they are in frame in the 2nd camera which makes their performance not as powerful. Having one camera allows for all their emotions and efforts go into that one screen so that the audience can be on the edge of their seats during those thrilling moments.
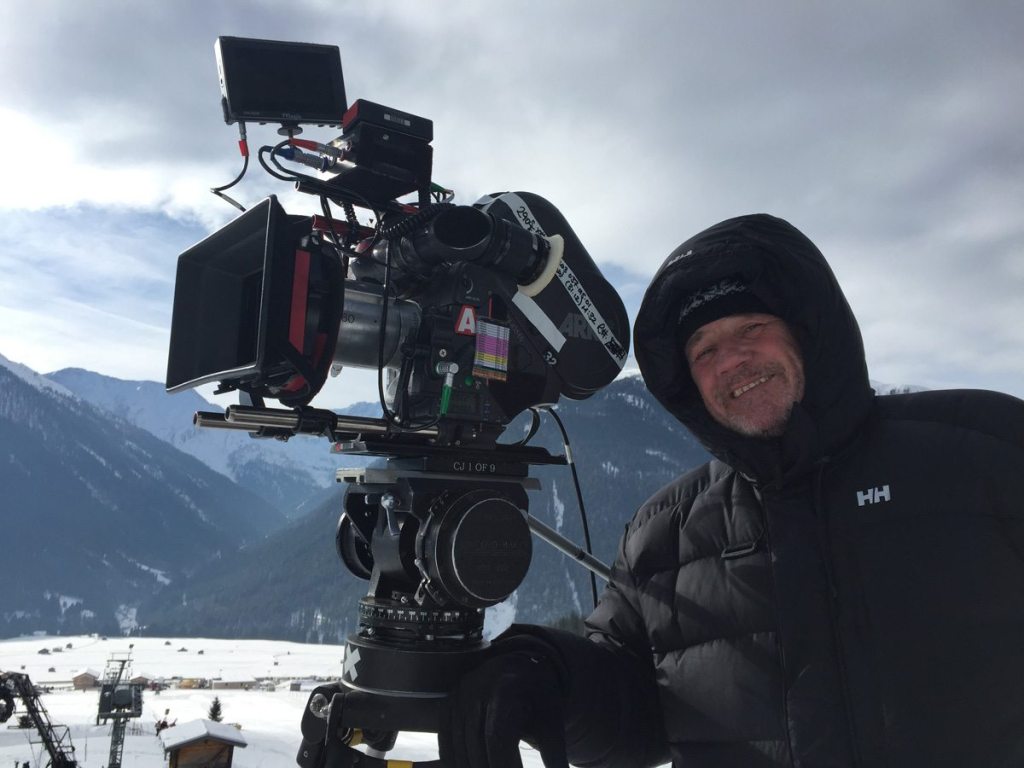
A Cam Operator- Clive Jackson (IMDB, N.D)
He then goes on to back my point up about the audience being on the edge of their seats due to the one camera set up where the actors can perform to their full potential.
“I prefer a level of restraint, to create tension. If you shout all the time, at some point the audience becomes oblivious to what’s being said. So you take the voice down and people move towards the edge of their seats and listen more. And that’s my approach to the cameras. (BC, 2015)
My Opinion
After looking at the differences between an events team who use a multi camera set up and a well established Cinematographer who uses only one camera, I sway more towards Hoyte, the Cinematographer. I feel like I can relate to what he says about getting an emotional performance from the actors, as there is no better feeling than capturing scenes that get the audience feeling nervous and on the edge of their seats. A multi camera set up is the perfect set up for an event or YouTube related shoots, as you can cover all angles and not miss anyone out on the set. However, when wanting to show scenes of emotions and power, a one camera set up is the way this should be shot. The actors can put their all into that one performance and not have to worry about anything else which is happening around them.
Planning…
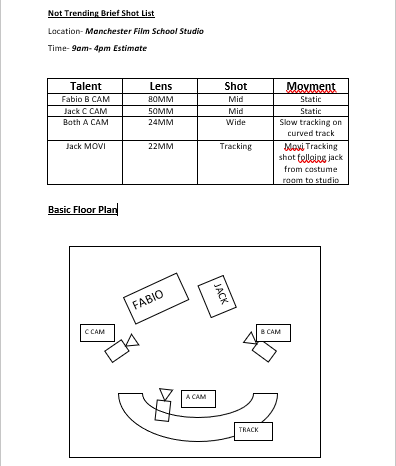
Rather than putting together a shot list at first, I decided to create a mood board of images, taken from TV Chat Shows such as, The Graham Norton Show and The James Cordon Show which could give me an idea into the types of shots I want for each camera. On the day of the shoot I took the mood board onto set with me and used this to delegate each camera their position.
Once I completed the mood board I then began to put together a basic shot list and floor plan. There wasn’t much detail which I needed to include as the cameras were staying static throughout most of the shoot. The floor plan tells me where the cameras will be and what camera they are.
The Movi Pro…
Having used the Movi Pro on other shoots at the film school, I was very familiar with how to maintain and operate the equipment which benefited me for this shoot. Jack wanted the opening shot to the show as a continuous move from one room to another; following him into the main studio where he would deliver his opening lines.
I decided to put the Sony A7R (Sony,2017) onto the Movi (Freefly, 2020) as this was the best option to use due to its lightweight movement and control. With me using the Movi, I needed the least possible weight to make life easier when operating, as it would give me more freedom to play around with creative ideas (K12 NOS). The shot was quite long which meant I needed as much testing as I could to make sure that on the day of the shoot I knew exactly what to do with the Movi.
The Result
The clip below is an example of the opening shot I managed to capture.
– G8 c) the types of additional safety ties required for the camera and its accessories
NOS- G18 BUILD AND SUPERVISE THE USE OF THE JIB ARM
Knowledge and understanding:
– G18 j) how to mount the camera safely on the jib
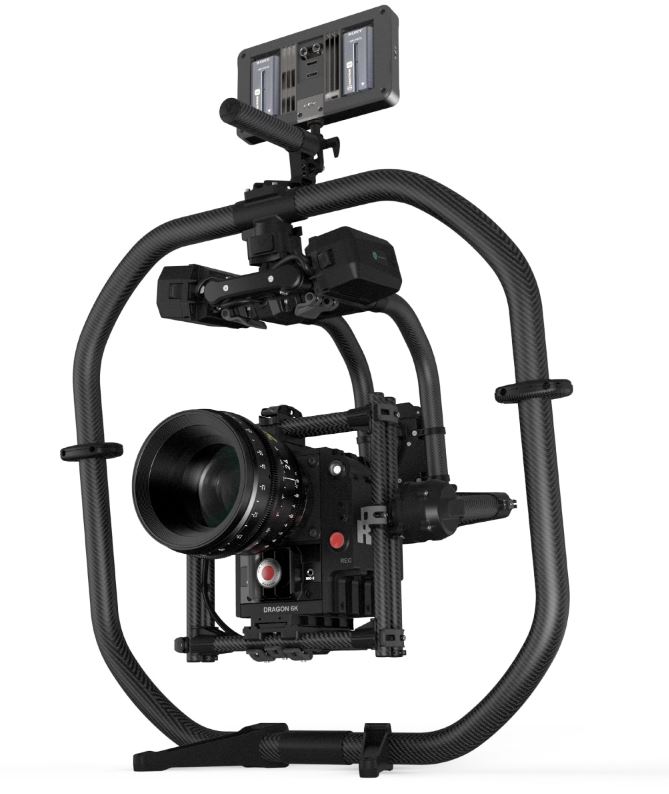
FREEFLY MOVI PRO (Freefly, 2020)
We have had a MOVI Freefly gimbal at the film school for a couple of years now; however, it is something which is not used that often. Going into my final year, I wanted to make sure that I had a good understanding of how the MOVI was rigged, as when I graduate, new technology such as this, is what film productions are beginning to use more often.
In this workshop I was able to note down a step by step instruction guide for how to assemble to gimbal and how to rig to camera to it.
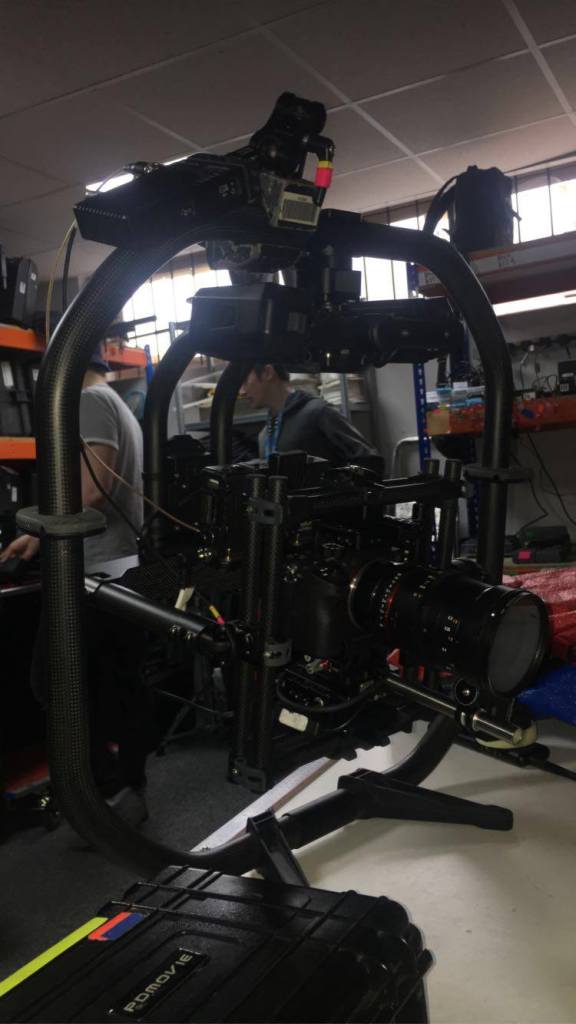
Rigging the Sony FS7 to the Movi Pro…
Step 1:The Movi Pro comes in two sections, connect the two together so that the gimbal is one complete piece of equipment
Step 2: Attatch the base plate from the movi kit to the bottom of the camera so that the camera is stable and going no where.
Step 3: Ensure that before putting the camera onto the movi, that the; lens, focus motor wheel, teradek and any other accessories needed for the camera , are already attached. This helps for when it comes to balancing the camera in the later stages.
A Stripped down Sony FS7 to only the body of the camera making it less heavy when put onto a head/gimbal.
Step 4: Before putting the camera onto the movi, tidy up all your cables so that your build is neat and professional.
Step 5: Attatch your camera to the movi then balance it using the grey locks. Ensure that the camera is put in the upside down position and use the side locks to balance it as best as you can.
Making sure that the camera is in its upside down position so that balancing is easier to perform.
A video created by ‘freefly systems’ helped me understand how to correctly balance the camera. (YouTube, 2017)
Step 8: Turn on the movi at the rear and using the movi app, select AUTOTUNE to automatically tune in the movi’s settings with the camera.
Step 9: Once the camera is ready to go, place it onto the head of the Jib which you are using. Once locked in place, you are ready to begin.
The Camera is now ready to be put onto the jib. It will be controlled by an operator using a mimic and an external monitor such as the ATMOS FLAME.
Jon Head- Jib Session…
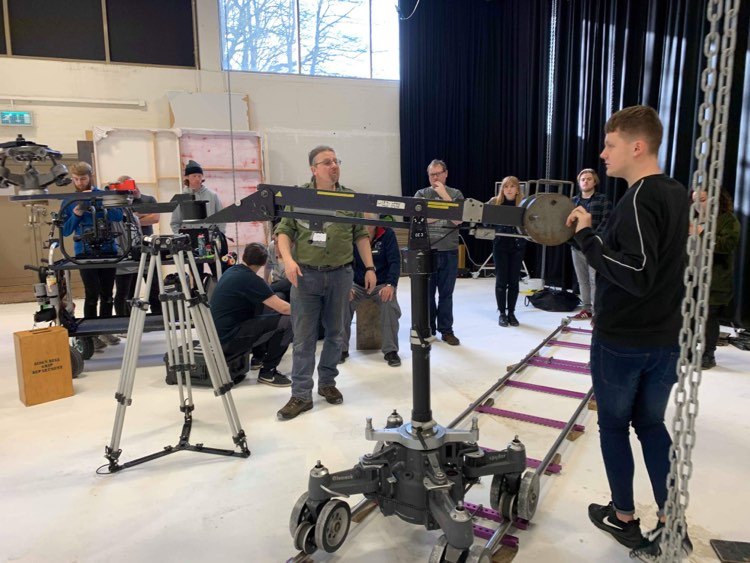
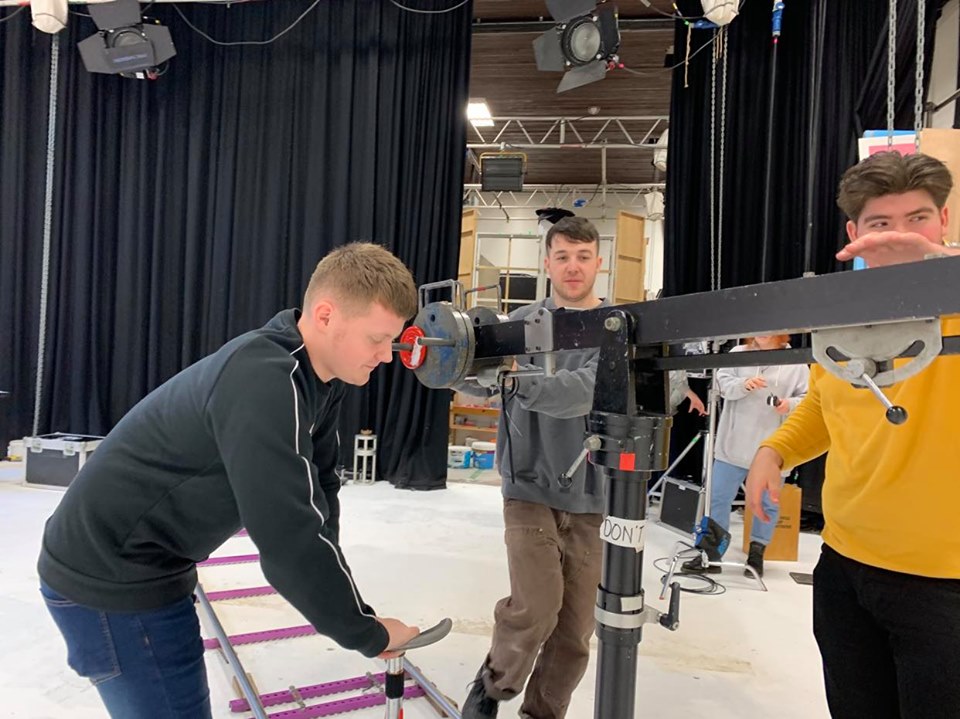
Grip Freelancer, Jon Head (IMDB, 2020), who has worked on projects such as ‘Blue Moon Rising’ and ‘Ali G Indahouse’, came in to give us a lesson on how to rig a GFM styled jib (Grip Factory Munich, 2020).
These jibs were made to be lightweight and flexible as well as allowing more weight to be placed onto them, meaning that almost any camera package would be acceptable for this jib. (APPENDIX 1)
Grip Factory Munich (GFM, 2020), found in 1999 have over the years gained credits for blockbuster movies such as: Star Wars Rise of Skywalker, Joker, Batman and Terminator aswell as many other recognised best sellers.
The Philosophy…
A page on their site explaining details about them, tells us the philosophy behind the company. They say:
“Our mission is to develop and produce camera support equipment that is innovative, effective and of the highest quality.” (APPENDIX 2)(GFM, 2020)
In a short video made by the company, industry workers all around the world give their opinions on GFM equipment and show an insight to just how good some of their products are. (YouTube, 2016) The quote written above, is explained through some of the words being told in the video.
GFM Company video. Reviews from industry workers all around the world.
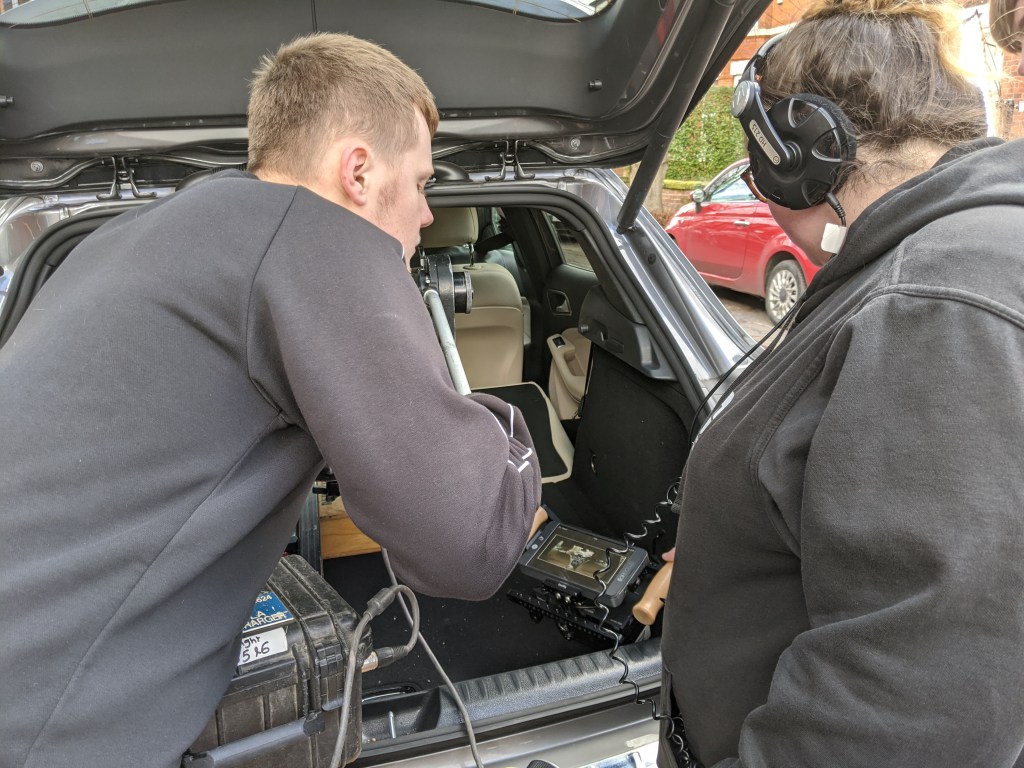
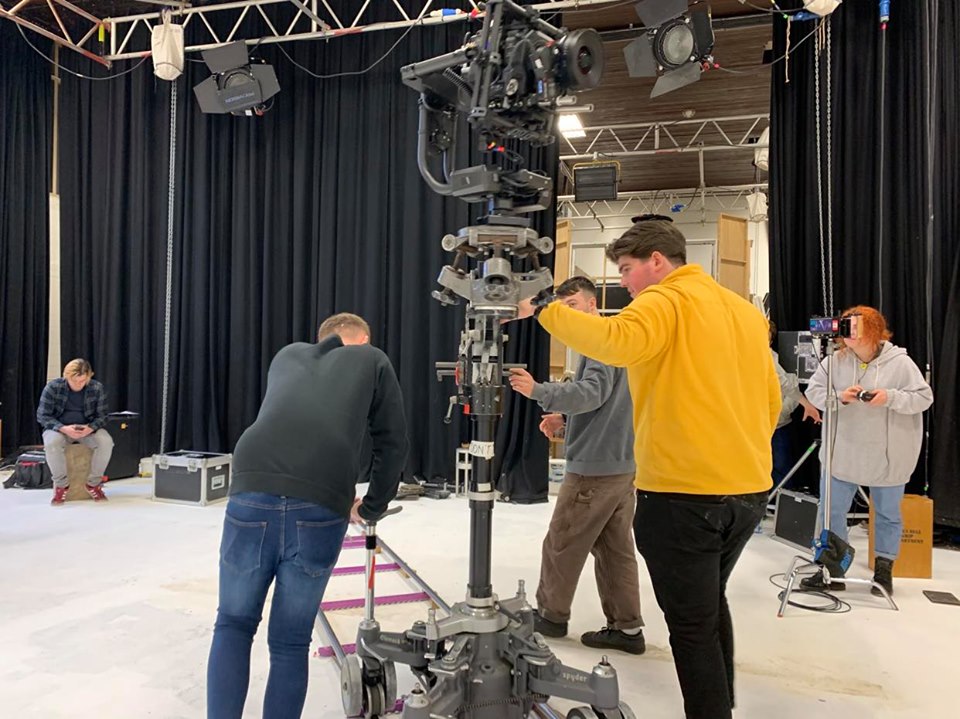
Remote Head Operating…
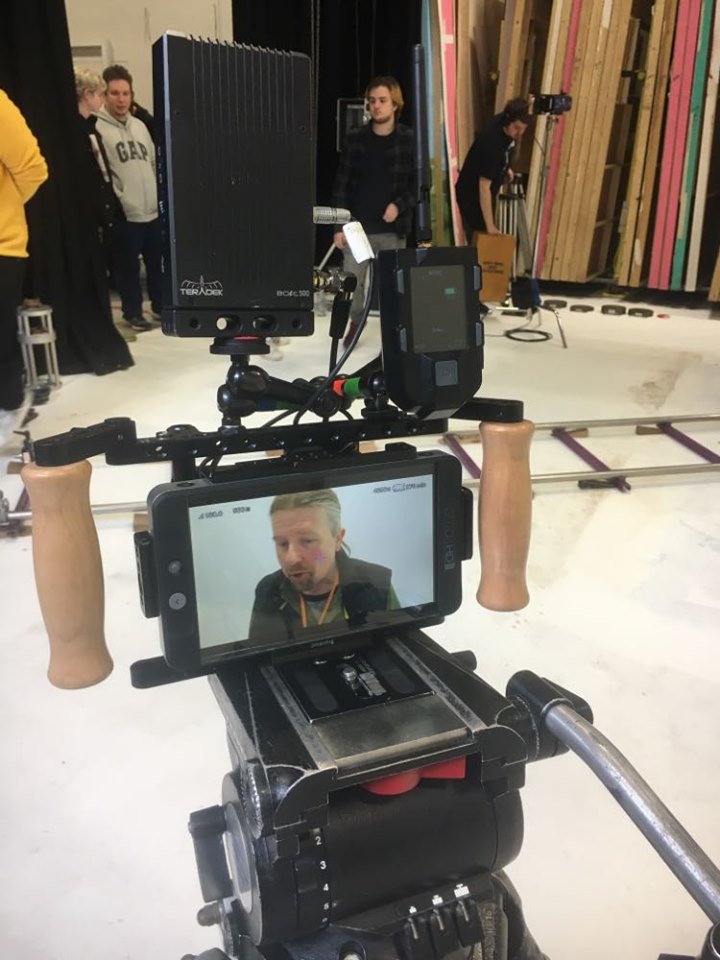
As you can see in the image on the LEFT, we have rigged the mimic on top of the SMALL HD Monitor along with the Teradek which will then allow operation of the Movi in the image on the RIGHT.
Remote Head Operating, is a type of camera operating which involves you controlling the camera from a monitor and in our case placing it onto a set of sticks for more control. In this session we rigged the Movi to the Jib, and in order to operate the camera we had to use a MIMIC (Freefly, N.D).
The way it works is by sending a signal from the Mimic device to the receiver on the Movi rig which picks up the signal, and allows you to adjust its settings such as, roll and tilt from the remote head. (APPENDIX 2A)This is very beneficial: if you were to select a setting and then attach the Movi to the jib, you then operate the camera and realise that its not at the right speed for its roll axis. Having the Mimic, avoids the need to take down the rig and amend the settings yourself.
A brief overview of the Mimic from Freefly systems, (YouTube, 2017)
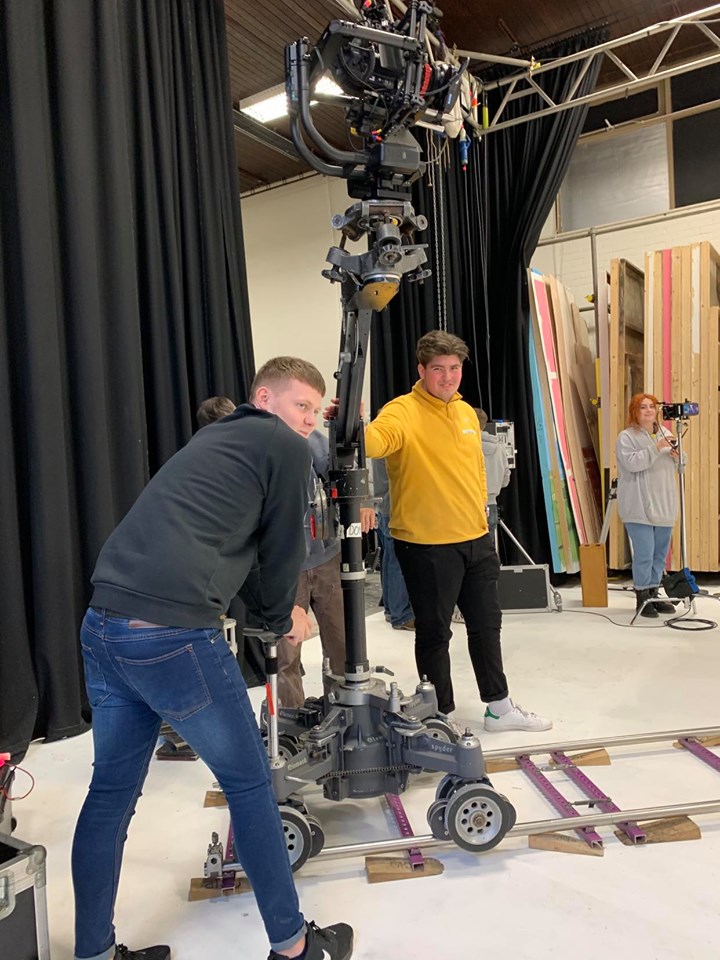
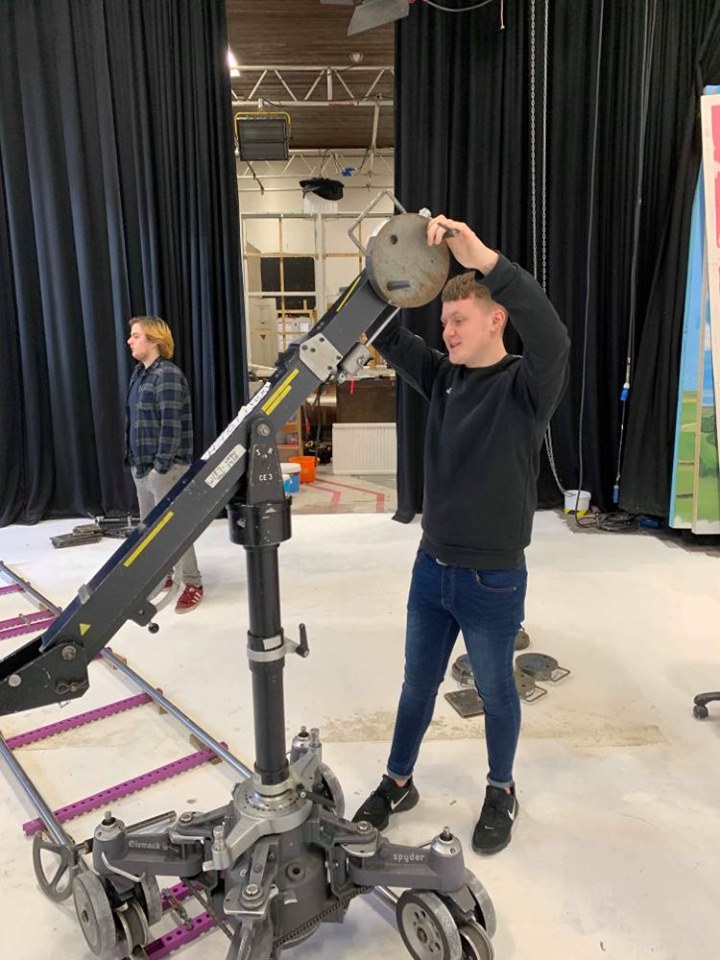
You must make sure that you are focusing when attaching the Movi to the Jib. This must be completed in a certain way (G18j NOS). Rigging the Movi to the Jib needs to be performed with extra care, as any potential damage could be costly. When attaching the Movi to the Jib you must make sure that both camera assistants are doing the task; the 2nd AC passes it over to the 1st, who then fits it into place on the head at the end of the Jib.
At first, I felt like this was going be a very difficult challenge having only used this rig once prior to this workshop. However, once everything was set up I began to get a really good feel of how it is operated, and have learnt that a Jib like this needs to be operated by three people. It is not a one man job. For the safety of the equipment and crew (G8C NOS), having three grips to the rig will eliminate any worries for those concerned.
As I have had more experience operating with the camera by my side, this would be my preferred way of operating. However, if more practice was to be completed with the Jib, then I feel that this way of operating would be the best choice out of the two, as it adds more freedom and creativity to the shot.
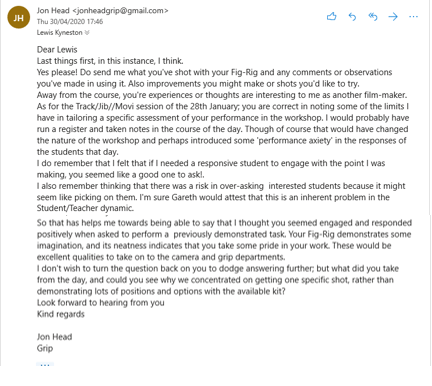
Feedback from Jon Head…
I got in touch with Jon asking if he was able to give me some feedback on my performance in the workshop.
This was his response;
After reviewing Jon’s feedback, I am in agreement with his comments. I have always considered myself as a dedicated student, and welcome all challenges. I am always up for a new challengee and this workshop was exactly that. As Jon says “… you seemed engaged and responded positively when asked to perform a previoulsy demonstrated task“, Whenever I am set a task, after watching a demonstration, I will give it my all to make sure I can try and match the previous example as best as I can.